Blazor には 7 つの Blazor があるのでメモ。
各内容は今後確認して行きます。まずは今回は種類を書き出します。
※間違っているかもしれません。そこはこれからしっかり確認して行きます。
| no | name | description | side | Windows | Mac | Android | iOS | dotnet command | Visual Studio (Project Template) | note |
|---|---|---|---|---|---|---|---|---|---|---|
| 1 | Blazor Server | Server Side で動作する Blazor。いわゆる普通の Web。 | Server | ○ | ○ | ○ | ○ | dotnet new blazorserver |
Blazor Server アプリ | |
| 2 | Blazor WebAssembly | WebAssembly 技術でクライアントサイドで動作する Blazor。 | Client | ○ | ○ | ○ | ○ | dotnet new blazorwasm |
Blazor WebAssembly アプリ | |
| 3 | Blazor Hybrid (.NET MAUI) | MAUI の WebView 上で Blazor Server を動かす。 | Client | ○ | ○ | ○ | ○ | dotnet new maui-blazor |
.NET MAUI Blazor App (Preview) | Preview 版 Visual Studio のインストールが必要 |
| 4 | Blazor Hybrid (Windows フォーム) | Windows フォームの WebView 上で Blazor Server を動かす。 | Client | ○ | - | - | - | dotnet new winforms |
Windwos フォーム アプリ | プロジェクト作成後に NuGet ライブラリ追加とプロジェクト ファイル (.csproj) の書き換えが必要 |
| 5 | Blazor Hybrid (WPF) | WPF の WebView 上で Blazor Server を動かす。 | Client | ○ | - | - | - | dotnet new wpf |
WPF アプリケーション | プロジェクト作成後に NuGet ライブラリ追加とプロジェクト ファイル (.csproj) の書き換えが必要 |
| 6 | Mobile Blazor Bindings | いわゆるモバイルアプリ(ネイティブアプリ)。 | Client | - | - | ○ | ○ | dotnet new mobileblazorbindings |
Experimental Mobile Blazor Bindings App | Visual Studio と Microsoft.MobileBlazorBindings.Templates プロジェクトテンプレートのインストールが必要 |
| 7 | Mobile Blazor Bindings (Hybrid) | モバイルだけでなくデスクトップ OS にも対応。 | Client | ○ | ○ | ○ | ○ | dotnet new blazorhybrid |
Experimental Mobile Blazor Bindings Hybrid App blazorhybrid | Visual Studio と Microsoft.MobileBlazorBindings.Templates プロジェクトテンプレートのインストールが必要 |
参考
> dotnet new --list

テンプレート名                                  短い名前              言語        タグ
----------------------------------------------  --------------------  ----------  --------------------------
( 中略 )
.NET MAUI Blazor App (Preview)                  maui-blazor           [C#]        MAUI/Android/iOS/macOS/Mac Catalyst/Windows/Blazor
( 中略 )
Blazor Server App                               blazorserver          [C#]        Web/Blazor
Blazor WebAssembly App                          blazorwasm            [C#]        Web/Blazor/WebAssembly/PWA
( 中略 )
Experimental Mobile Blazor Bindings App         mobileblazorbindings  [C#]        Blazor/Xamarin.Forms
Experimental Mobile Blazor Bindings Hybrid App  blazorhybrid          [C#]        Blazor/Xamarin.Forms/Web
( 中略 )
Windows フォーム アプリ                         winforms              [C#],VB     Common/WinForms
( 中略 )
WPF アプリケーション                            wpf                   [C#],VB     Common/WPF
■ Blazor Server プロジェクトの作り方
一番シンプルな Blazor Server プロジェクトを作ってみたいと思います。
□ dotnet command
コマンドで作成すると手ばやいです。
> dotnet new blazorserver -o BlazorServerSample
実行はプロジェクト ファイル (.csproj) のある場所で dotnet run 。
> cd .\BlazorServerSample\
> dotnet run
実行したら、コンソールに表示されている URL (https://localhost:XXXX) を Web ブラウザでアクセスします。
PS C:\sample\BlazorServerSample> dotnet run
ビルドしています...
info: Microsoft.Hosting.Lifetime[14]
      Now listening on: https://localhost:7122
info: Microsoft.Hosting.Lifetime[14]
      Now listening on: http://localhost:5045
info: Microsoft.Hosting.Lifetime[0]
      Application started. Press Ctrl+C to shut down.
info: Microsoft.Hosting.Lifetime[0]
      Hosting environment: Development
info: Microsoft.Hosting.Lifetime[0]
      Content root path: C:\sample\BlazorServerSample\
Blazor Server の Web アプリが開きました。
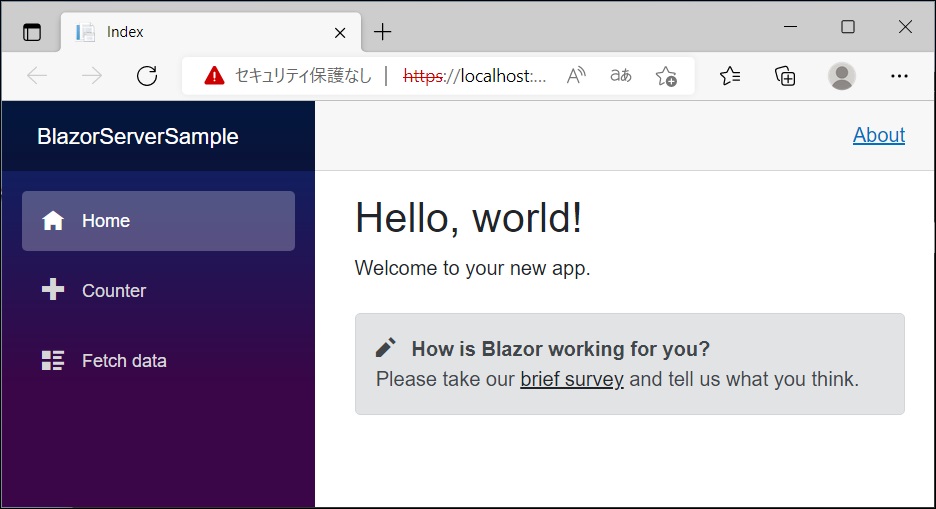
左ペインで [ Counter ] を選択。
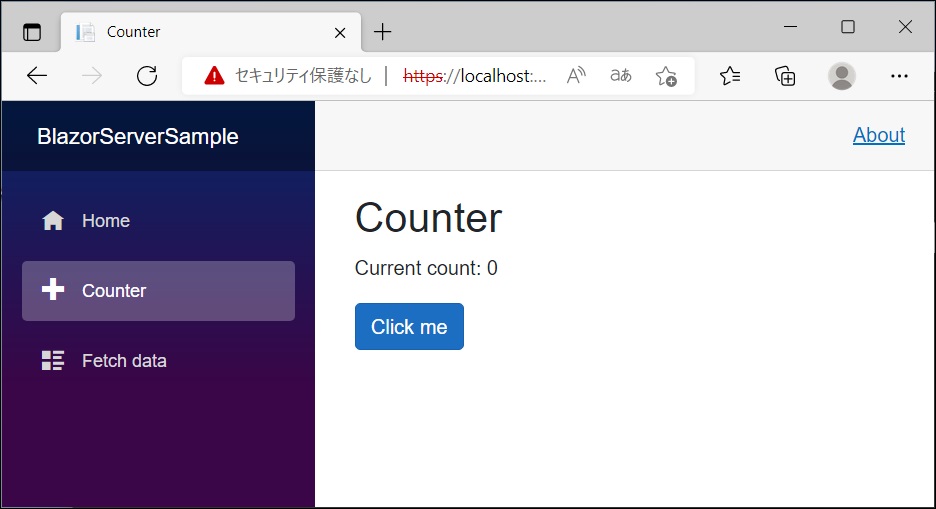
[ Click me ] をクリックするたびにカウントが増えていきます。(プロジェクトテンプレートでそういう動作が実装されています)
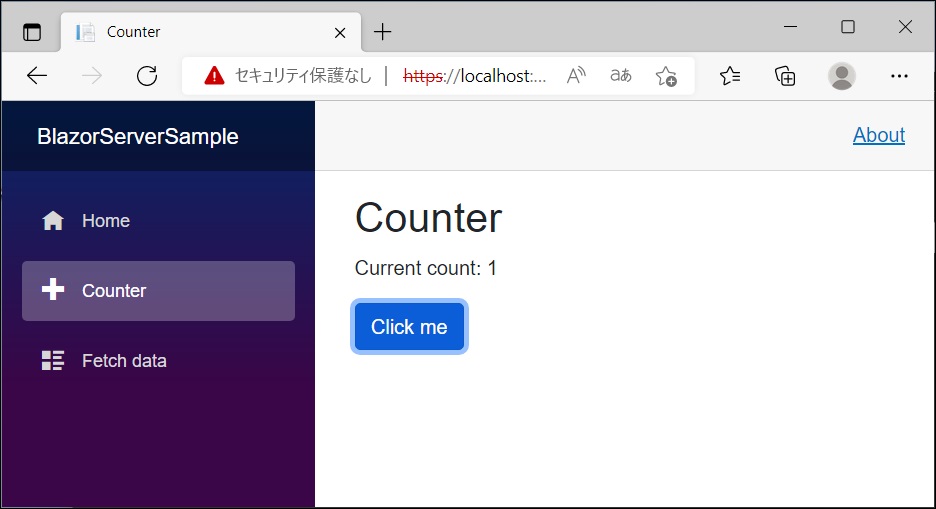
これで Blazor Server のプロジェクトを作成して実行することができました。
□ Visual Studio
ワークロード ASP.NET と Web 開発 が必要です。
Visual Studio の場合はプロジェクトの作成から。

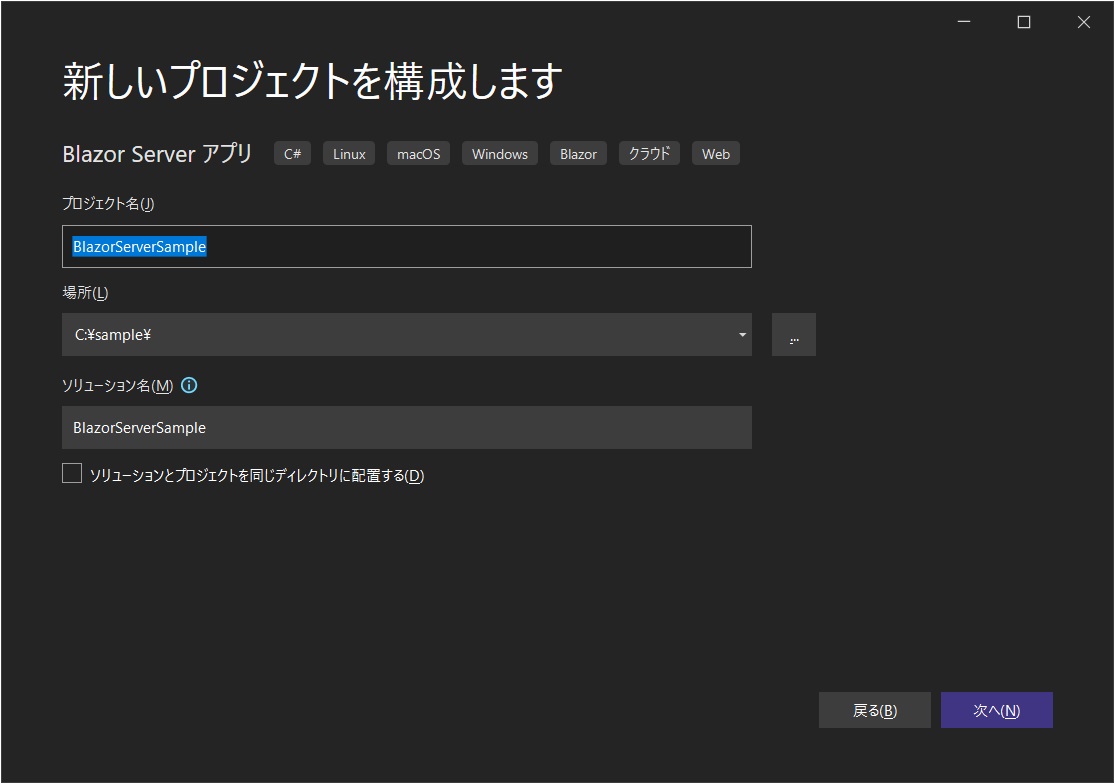
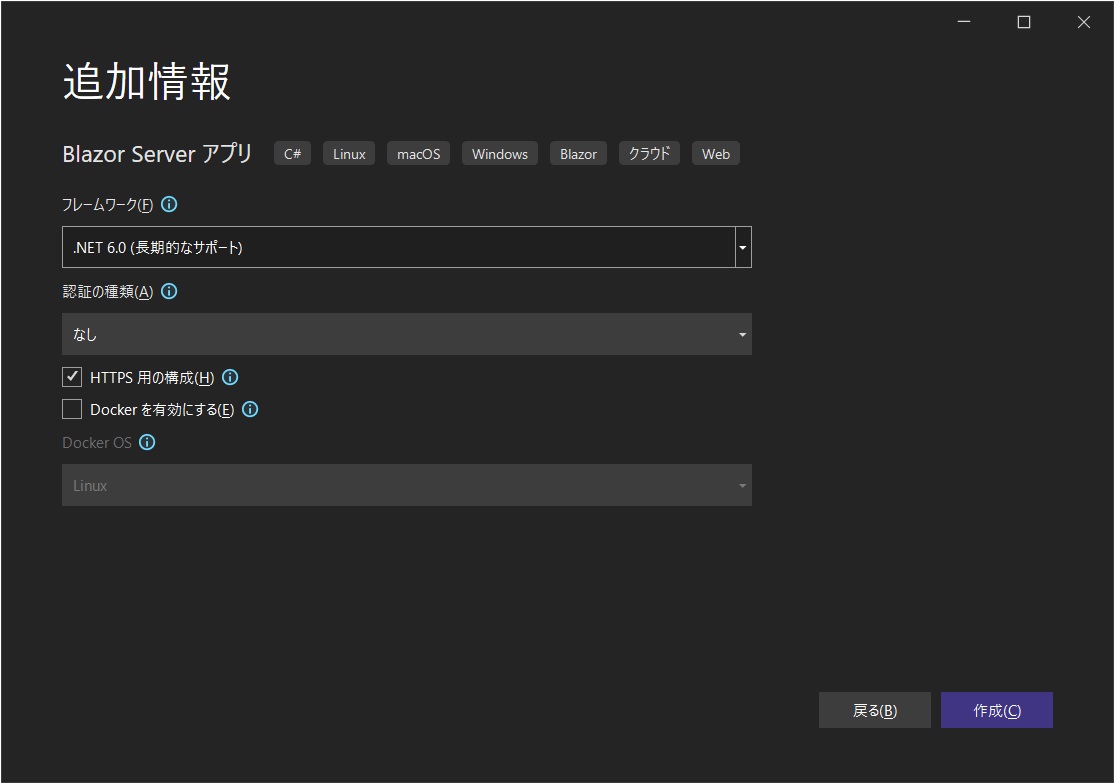
プロジェクト (ソリューション) が作成され、Visual Studio で開かれます。

デバッグ実行でブラウザが起動し、サイトが開きます。
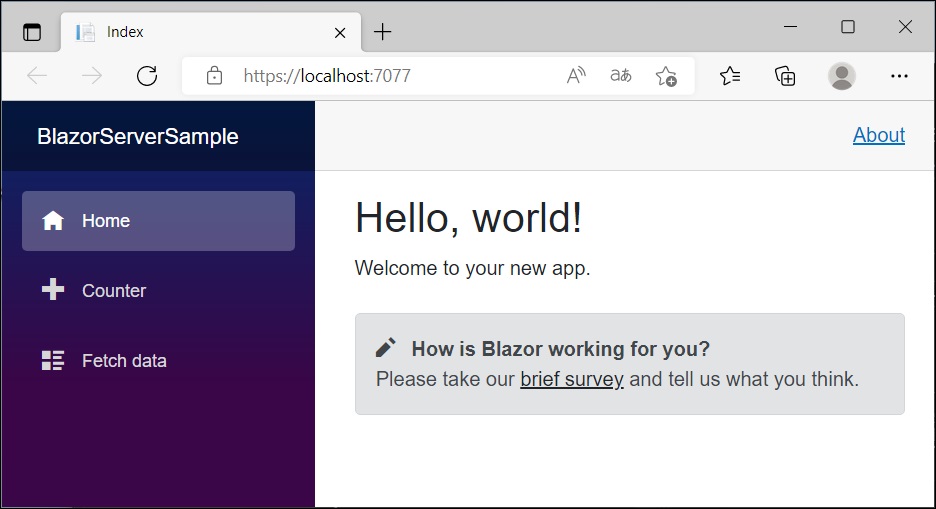
□ 簡単ですね
簡単ですね。
■ Blazor WebAssembly プロジェクトの作り方
一番シンプルな Blazor WebAssembly プロジェクトを作ってみたいと思います。
□ dotnet command
コマンドで作成すると手ばやいです。
> dotnet new blazorwasm -o BlazorWasmSamle
実行はプロジェクト ファイル (.csproj) のある場所で dotnet run 。
> cd .\BlazorWasmSamle\
> dotnet run
実行したら、コンソールに表示されている URL (https://localhost:XXXX) を Web ブラウザでアクセスします。
PS C:\sample\BlazorWasmSamle> dotnet run
ビルドしています...
info: Microsoft.Hosting.Lifetime[14]
      Now listening on: https://localhost:7276
info: Microsoft.Hosting.Lifetime[14]
      Now listening on: http://localhost:5231
info: Microsoft.Hosting.Lifetime[0]
      Application started. Press Ctrl+C to shut down.
info: Microsoft.Hosting.Lifetime[0]
      Hosting environment: Development
info: Microsoft.Hosting.Lifetime[0]
      Content root path: C:\sample\BlazorWasmSamle
Blazor WebAssembly の Web アプリが開きました。DLL などもダウンロードされていることが見えます。

左ペインで [ Counter ] を選択。
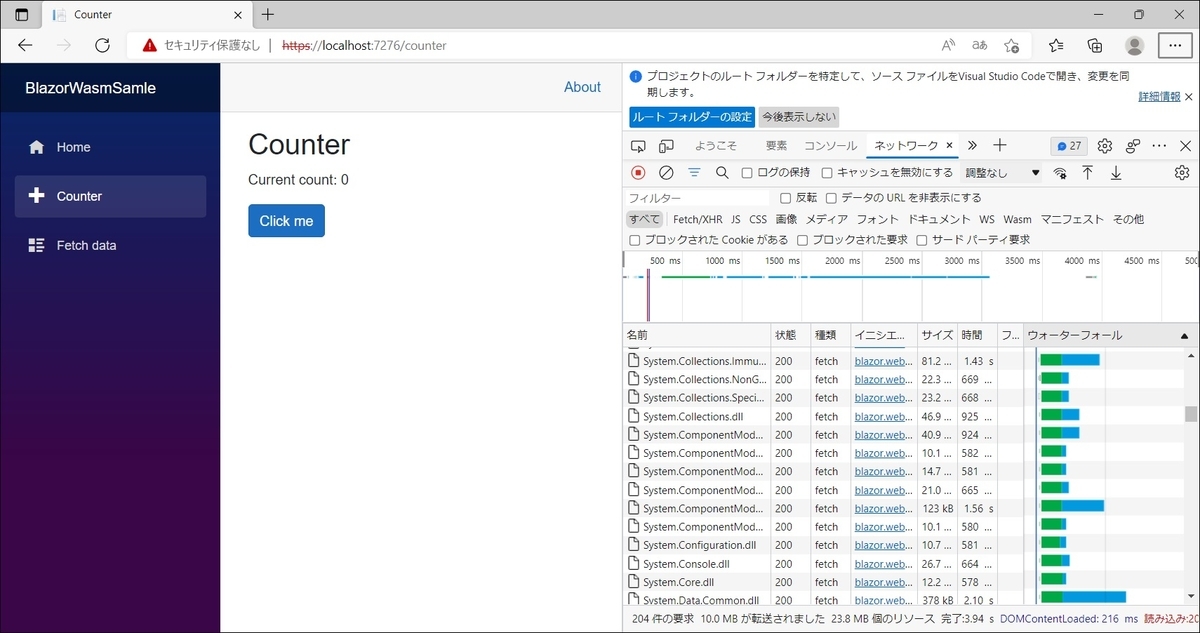
[ Click me ] をクリックするたびにカウントが増えていきます。(プロジェクトテンプレートでそういう動作が実装されています)
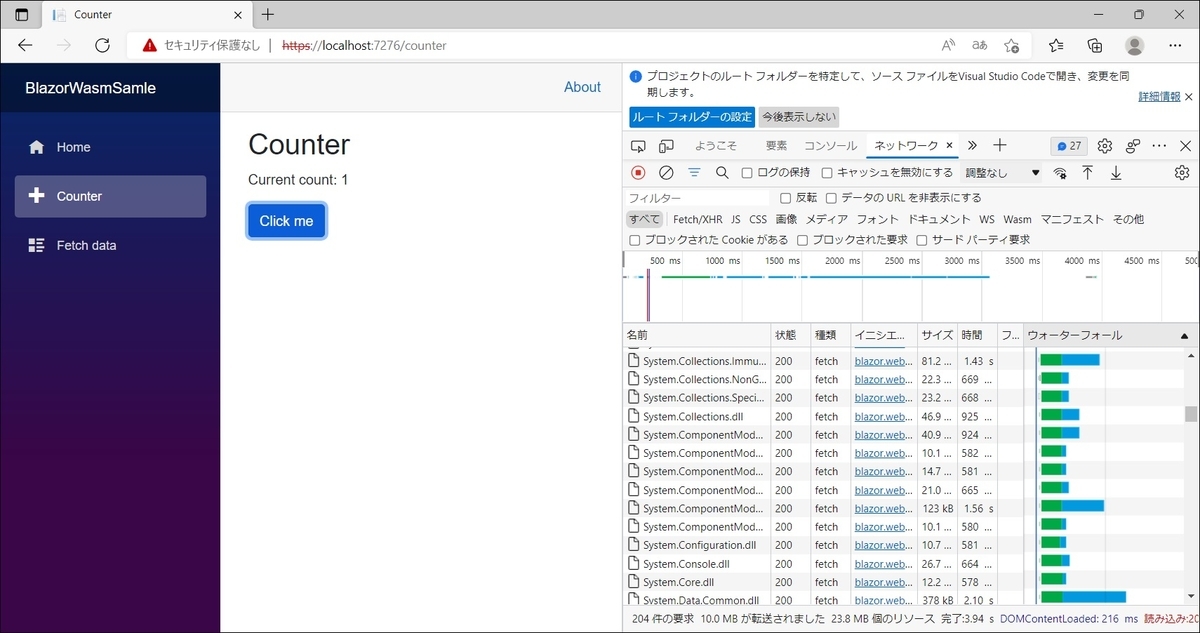
これで Blazor WebAssembly のプロジェクトを作成して実行することができました。
□ Visual Studio
ワークロード ASP.NET と Web 開発 が必要です。
Visual Studio の場合はプロジェクトの作成から。
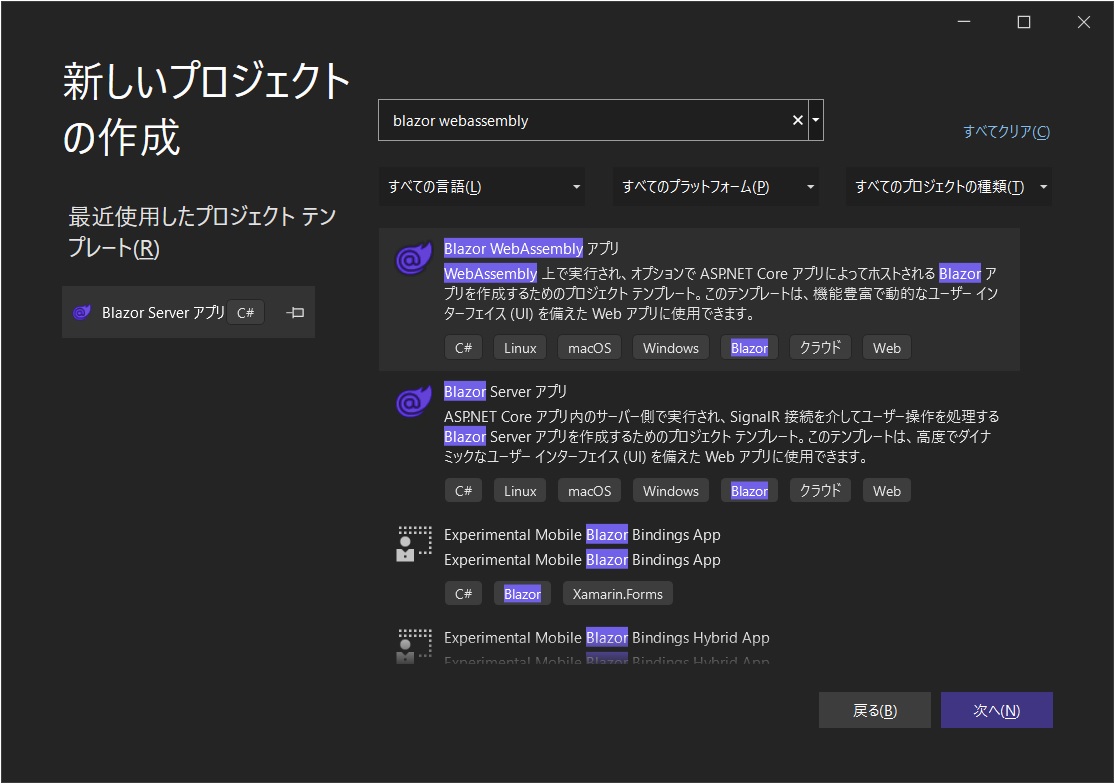


プロジェクト (ソリューション) が作成され、Visual Studio で開かれます。

デバッグ実行でブラウザが起動し、サイトが開きます。

□ 簡単ですね
簡単ですね。
■ Blazor Hybrid (.NET MAUI) プロジェクトの作り方
わりとシンプルな Blazor Hybrid (.NET MAUI プロジェクトを作ってみたいと思います。
□ dotnet command
今回はビルドや実行には Visual Studio が便利なのでコマンドでは作成せず Visual Studio でやっていきたいと思います。
□ Visual Studio
参考 docs.microsoft.com 正直なところ、ここに書いてあることで十分なので特に補足することはないのですが、やっていきたいと思います。
準備
Visual Studio のプレビュー版をインストールします。
ワークロード .NET によるモバイル開発 が必要です。
プロジェクト (ソリューション) 作成
Visual Studio のプロジェクトの作成から。

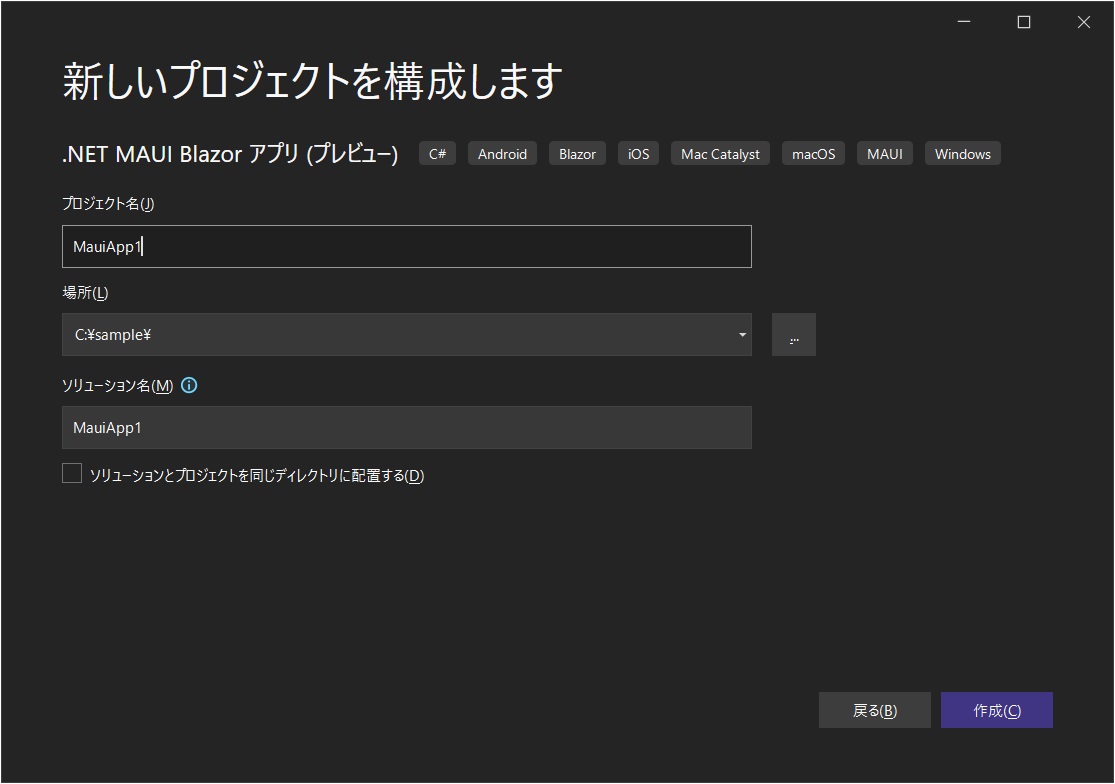
プロジェクト (ソリューション) が作成され、Visual Studio で開かれます。
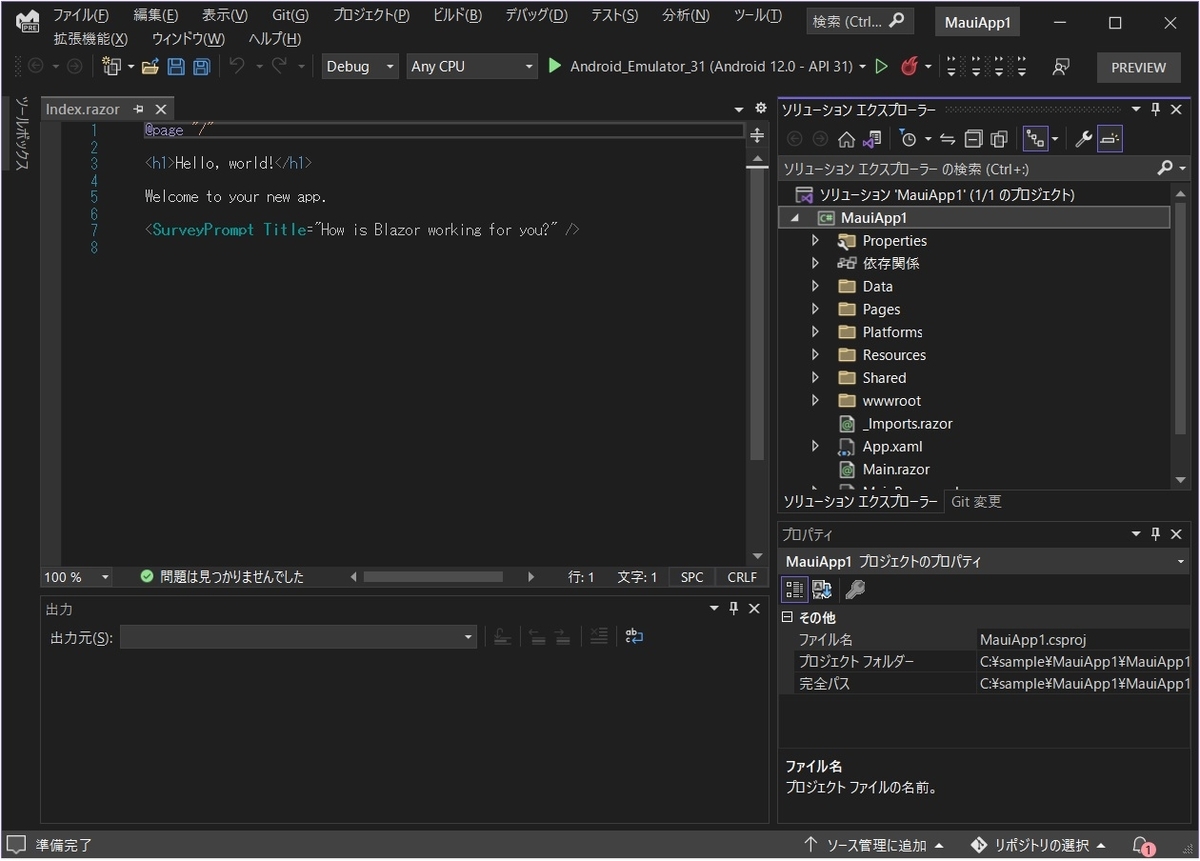
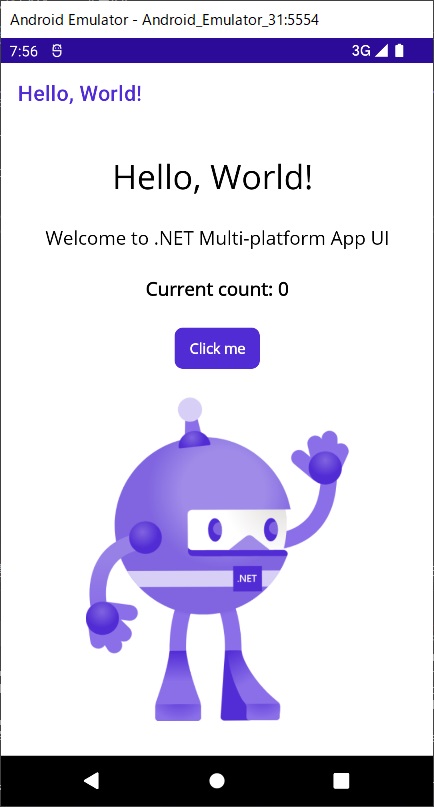
実行
デバッグ実行で Android エミュレーターが起動し、アプリが開きます。
Windows でも実行してみたいと思います。
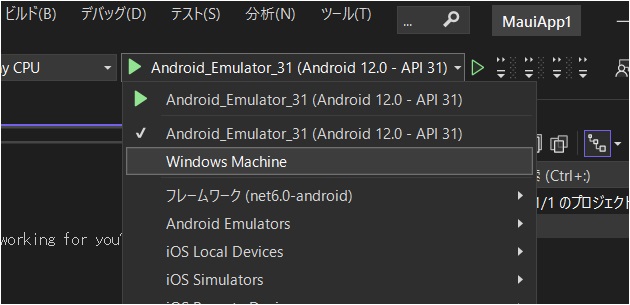
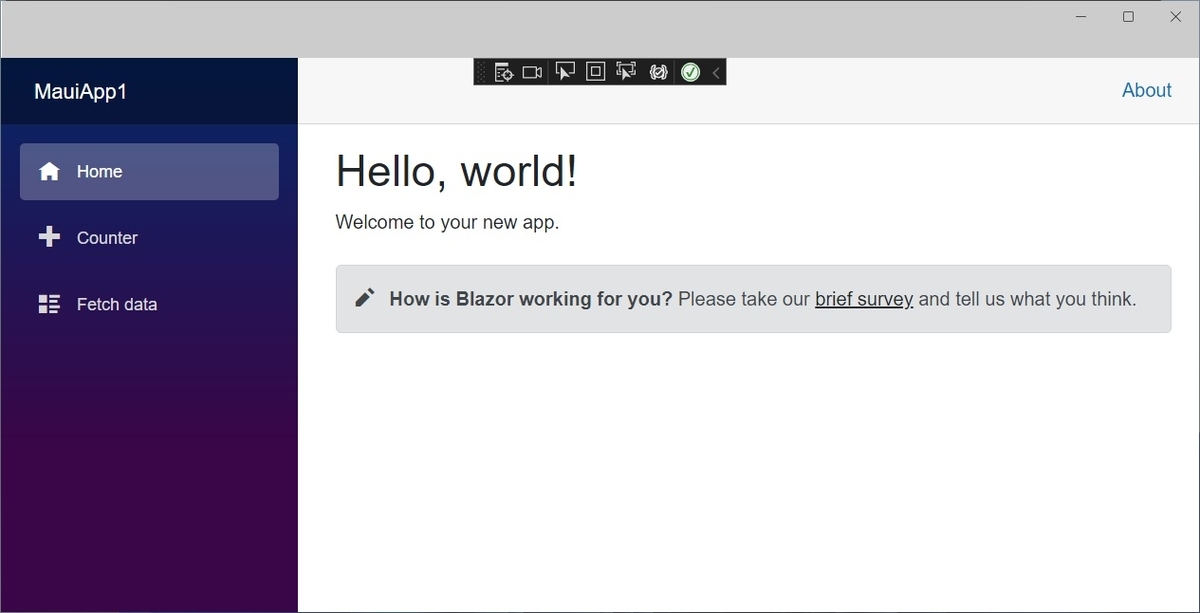
特に何事もなく実行できました。
□ 簡単ですね
簡単ですね。
■ Blazor Hybrid (Windows フォーム) プロジェクトの作り方
少し複雑なな Blazor Hybrid (Windows フォーム) プロジェクトを作ってみたいと思います。
参考
□ dotnet command
コマンドで作成すると手ばやいです。
> dotnet new winforms -o BlazorWinFormsSample
> cd .\BlazorWinFormsSample\
.csproj ファイルの編集
少し複雑なので .csproj ファイルを編集します。
テキストエディタで .csproj ファイルを開きます (ここではメモ帳で開いています)。
> notepad .\BlazorWinFormsSample.csproj
開いたファイルは次のようになっています。
<Project Sdk="Microsoft.NET.Sdk">

  <PropertyGroup>
    <OutputType>WinExe</OutputType>
    <TargetFramework>net6.0-windows</TargetFramework>
    <Nullable>enable</Nullable>
    <UseWindowsForms>true</UseWindowsForms>
    <ImplicitUsings>enable</ImplicitUsings>
  </PropertyGroup>

</Project>
この先頭の Sdk 部分を Microsoft.NET.Sdk.Razor と変更します。
<Project Sdk="Microsoft.NET.Sdk.Razor">

  <PropertyGroup>
    <OutputType>WinExe</OutputType>
    <TargetFramework>net6.0-windows</TargetFramework>
    <Nullable>enable</Nullable>
    <UseWindowsForms>true</UseWindowsForms>
    <ImplicitUsings>enable</ImplicitUsings>
  </PropertyGroup>

</Project>
Blazor ソースファイルを作成
プロジェクト内に Blazor 部分となる 4 つのソースファイルを追加します。
mkdir wwwroot
mkdir wwwroot\css
"@using Microsoft.AspNetCore.Components.Web"  | Out-File -Encoding utf8 _Imports.razor
"<!DOCTYPE html>`n<html lang=`"en`">`n<head>`n    <meta charset=`"utf-8`" />`n    <meta name=`"viewport`" content=`"width=device-width, initial-scale=1.0`" />`n    <title>WinFormsBlazor</title>`n    <base href=`"/`" />`n    <link href=`"css/app.css`" rel=`"stylesheet`" />`n    <link href=`"WinFormsBlazor.styles.css`" rel=`"stylesheet`" />`n</head>`n`n<body>`n`n    <div id=`"app`">Loading...</div>`n`n    <div id=`"blazor-error-ui`">`n        An unhandled error has occurred.`n        <a href=`"`" class=`"reload`">Reload</a>`n        <a class=`"dismiss`">🗙</a>`n    </div>`n`n    <script src=`"_framework/blazor.webview.js`"></script>`n`n</body>`n`n</html>" | Out-File -Encoding utf8 wwwroot/index.html
"html, body {`n    font-family: 'Helvetica Neue', Helvetica, Arial, sans-serif;`n}`n`n.valid.modified:not([type=checkbox]) {`n    outline: 1px solid #26b050;`n}`n`n.invalid {`n    outline: 1px solid red;`n}`n`n.validation-message {`n    color: red;`n}`n`n#blazor-error-ui {`n    background: lightyellow;`n    bottom: 0;`n    box-shadow: 0 -1px 2px rgba(0, 0, 0, 0.2);`n    display: none;`n    left: 0;`n    padding: 0.6rem 1.25rem 0.7rem 1.25rem;`n    position: fixed;`n    width: 100%;`n    z-index: 1000;`n}`n`n    #blazor-error-ui .dismiss {`n        cursor: pointer;`n        position: absolute;`n        right: 0.75rem;`n        top: 0.5rem;`n    }"  | Out-File -Encoding utf8 wwwroot/css/app.css
"<h1>Counter</h1>`n`n<p>Current count: @currentCount</p>`n`n<button class=`"btn btn-primary`" @onclick=`"IncrementCount`">Click me</button>`n`n@code {`n    private int currentCount = 0;`n`n    private void IncrementCount()`n    {`n        currentCount++;`n    }`n}"  | Out-File -Encoding utf8 Counter.razor
次の 4 ファイルが作れているはずです。
ここで行っているファイル作成方法については次の記事に。
出来上がったファイル
_Imports.razor
@using Microsoft.AspNetCore.Components.Web
wwwroot/index.html
<!DOCTYPE html>
<html lang="en">
<head>
    <meta charset="utf-8" />
    <meta name="viewport" content="width=device-width, initial-scale=1.0" />
    <title>WinFormsBlazor</title>
    <base href="/" />
    <link href="css/app.css" rel="stylesheet" />
    <link href="WinFormsBlazor.styles.css" rel="stylesheet" />
</head>

<body>

    <div id="app">Loading...</div>

    <div id="blazor-error-ui">
        An unhandled error has occurred.
        <a href="" class="reload">Reload</a>
        <a class="dismiss">🗙</a>
    </div>

    <script src="_framework/blazor.webview.js"></script>

</body>

</html>
wwwroot/css/app.css
html, body {
    font-family: 'Helvetica Neue', Helvetica, Arial, sans-serif;
}

.valid.modified:not([type=checkbox]) {
    outline: 1px solid #26b050;
}

.invalid {
    outline: 1px solid red;
}

.validation-message {
    color: red;
}

#blazor-error-ui {
    background: lightyellow;
    bottom: 0;
    box-shadow: 0 -1px 2px rgba(0, 0, 0, 0.2);
    display: none;
    left: 0;
    padding: 0.6rem 1.25rem 0.7rem 1.25rem;
    position: fixed;
    width: 100%;
    z-index: 1000;
}

#blazor-error-ui .dismiss {
    cursor: pointer;
    position: absolute;
    right: 0.75rem;
    top: 0.5rem;
}
Counter.razor
<h1>Counter</h1>

<p>Current count: @currentCount</p>

<button class="btn btn-primary" @onclick="IncrementCount">Click me</button>

@code {
    private int currentCount = 0;

    private void IncrementCount()
    {
        currentCount++;
    }
}
画面のコードを編集
画面のコードを開きます。
> notepad .\Form1.cs
開いたファイルの先頭に 2 つの using を追加します。
using Microsoft.AspNetCore.Components.WebView.WindowsForms;
using Microsoft.Extensions.DependencyInjection;
一つの読み取り専用プロパティを追加します。
BlazorWebView blazorWebView1 { get; };
コンストラクタにコントロールの追加とコントロールへの設定を追加します。Windows フォームのコントロールはシンプルなのでコードだけで UI が作りやすくて直感的ですね。
this.Controls.Add(blazorWebView1 = new BlazorWebView{
    Dock = DockStyle.Fill
});

var services = new ServiceCollection();
services.AddWindowsFormsBlazorWebView();
blazorWebView1.HostPage = "wwwroot\\index.html";
blazorWebView1.Services = services.BuildServiceProvider();
blazorWebView1.RootComponents.Add<Counter>("#app");
ファイルはこんな感じになります。
Form1.cs
using Microsoft.AspNetCore.Components.WebView.WindowsForms;
using Microsoft.Extensions.DependencyInjection;

namespace BlazorWinFormsSample;

public partial class Form1 : Form
{
    BlazorWebView blazorWebView1 { get; }

    public Form1()
    {
       InitializeComponent();

        this.Controls.Add(blazorWebView1 = new BlazorWebView{
            Dock = DockStyle.Fill
        });

        var services = new ServiceCollection();
        services.AddWindowsFormsBlazorWebView();
        blazorWebView1.HostPage = "wwwroot\\index.html";
        blazorWebView1.Services = services.BuildServiceProvider();
        blazorWebView1.RootComponents.Add<Counter>("#app");
    }
}
NuGet パッケージのインストール
prerelease 版の NuGet パッケージをインストールします。
> dotnet add package Microsoft.AspNetCore.Components.WebView.WindowsForms --prerelease
□ 実行
実行はプロジェクト ファイル (.csproj) のある場所で dotnet run 。
> dotnet run
Windows フォームアプリの中で Blazor が動きました。
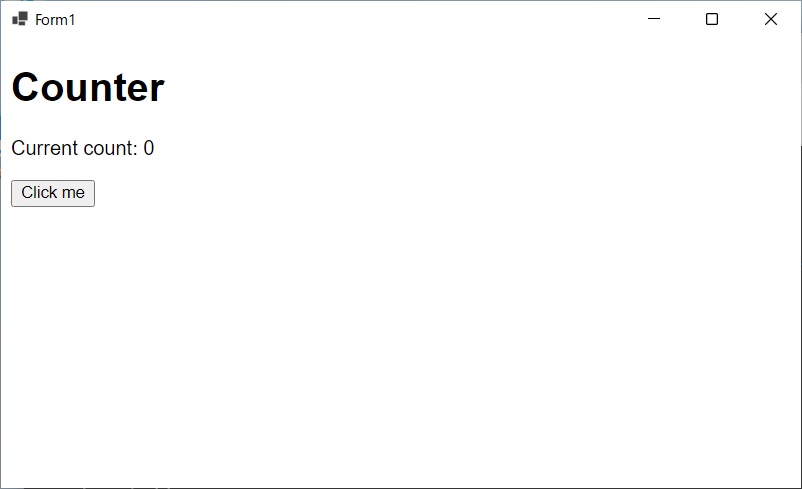
これで Blazor Hybrid (Windows フォーム) のプロジェクトを作成して実行することができました。
□ Visual Studio
ワークロード .NET デスクトップ開発 が必要です。
Visual Studio の場合はプロジェクトの作成から。
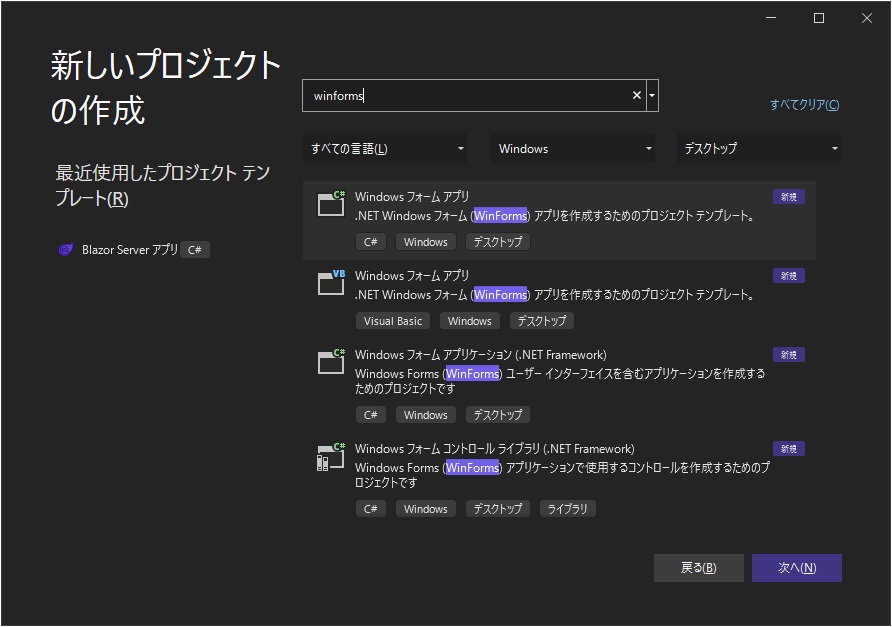
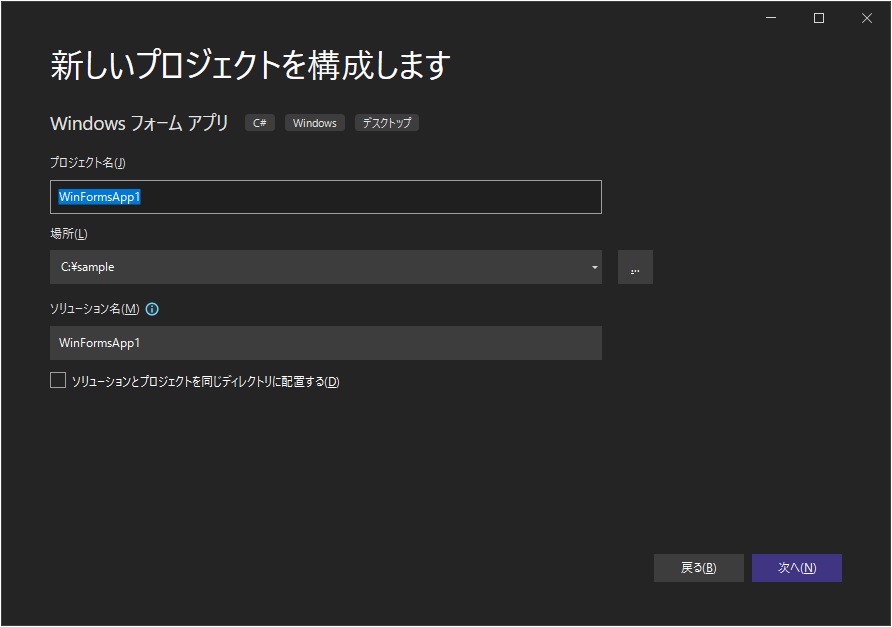

プロジェクト (ソリューション) が作成され、Visual Studio で開かれます。
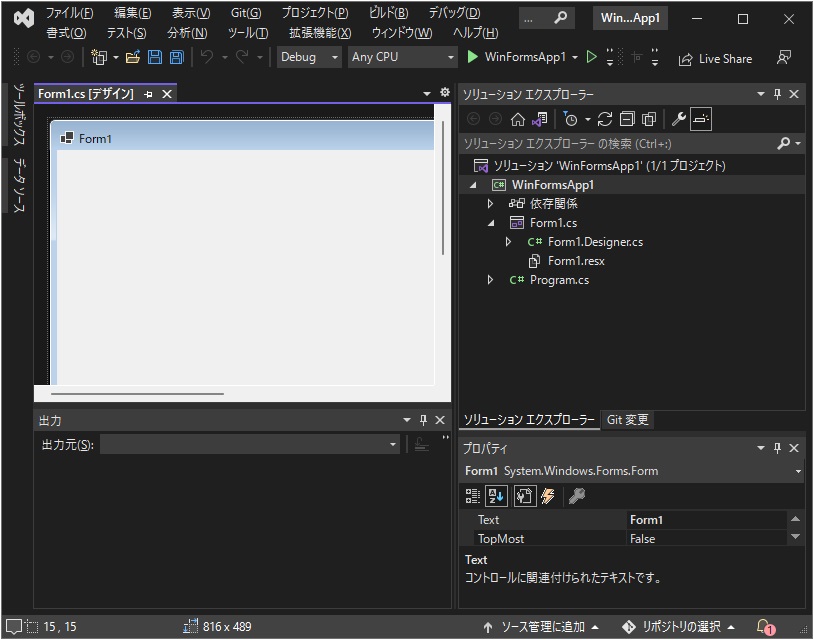
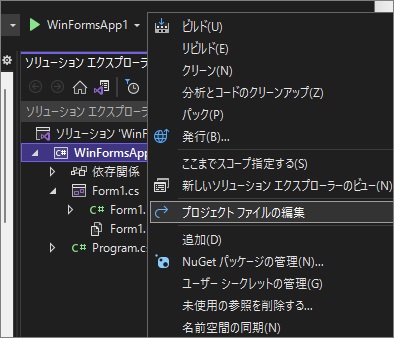
プロジェクトファイルを編集します。
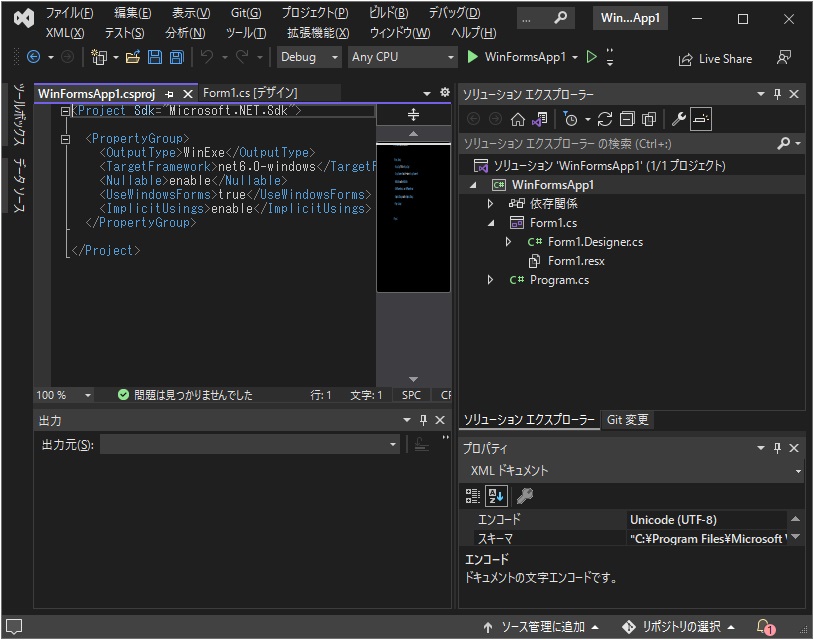
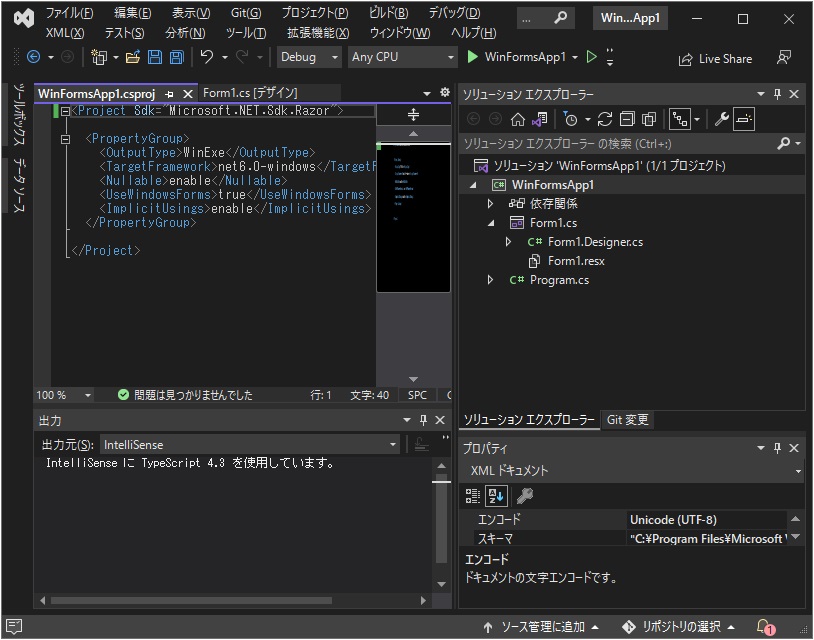
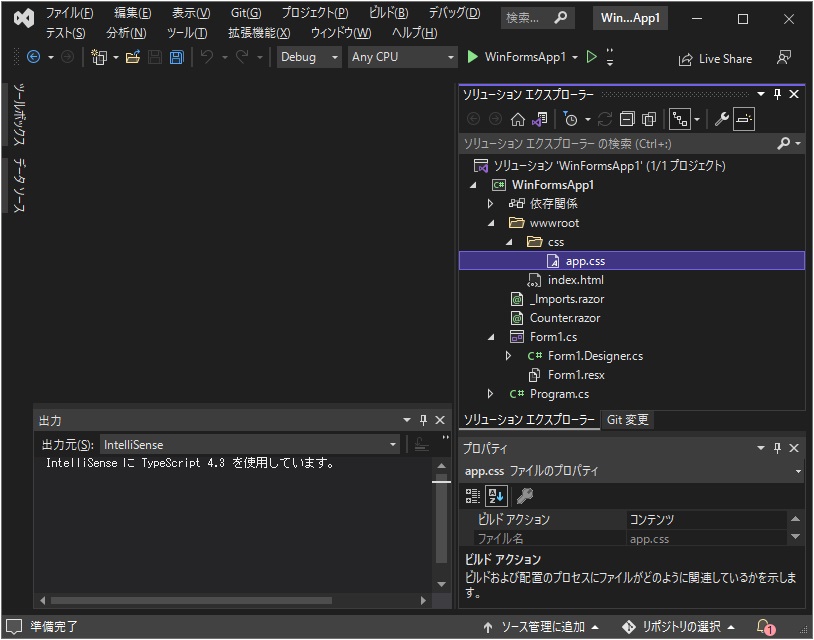
コマンドラインの時と同様に Blazor の 4 ファイルを追加します。
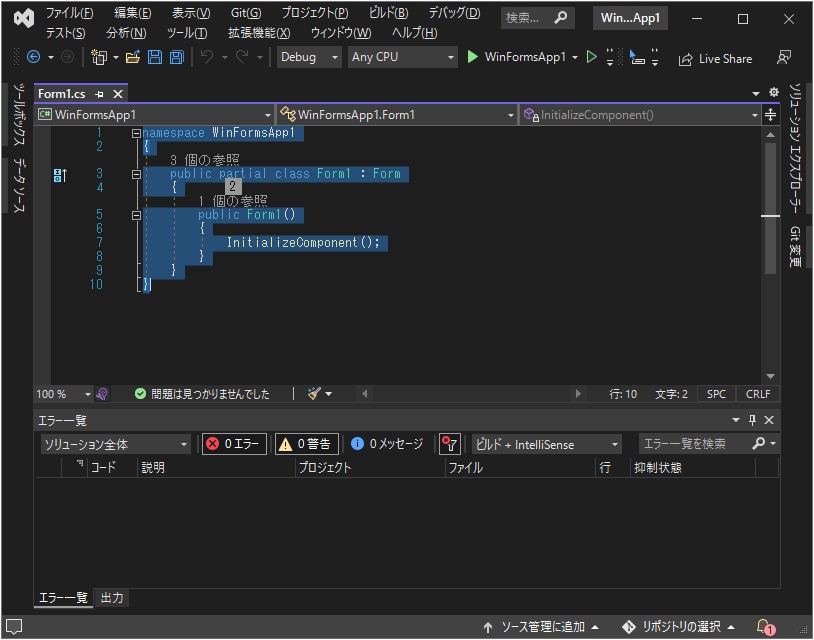
フォームのソースも同様に編集します。
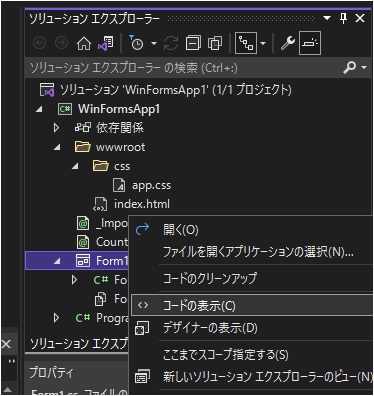
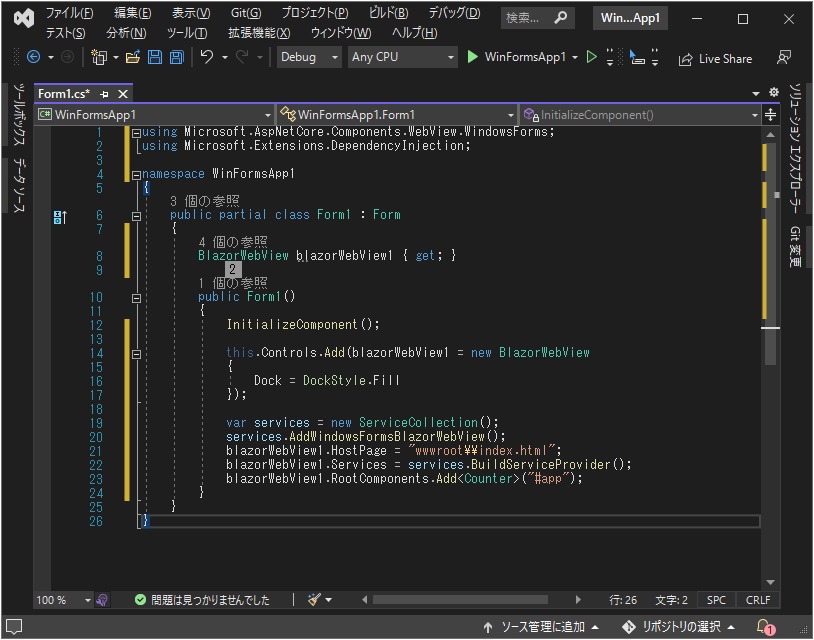
NuGet パッケージを追加します。プレリリースを含める のチェックを忘れないでください。


デバッグ実行で Windows フォームアプリの中で Blazor が動きました。

□ 簡単ですね
簡単ですね。
■ Blazor Hybrid (WPF) プロジェクトの作り方
少し複雑な Blazor Hybrid (WPF) プロジェクトを作ってみたいと思います。
参考
□ dotnet command
コマンドで作成すると手ばやいです。
> dotnet new wpf -o BlazorWpfSample
> cd .\BlazorWpfSample\
.csproj ファイルの編集
少し複雑なので .csproj ファイルを編集します。
テキストエディタで .csproj ファイルを開きます (ここではメモ帳で開いています)。
> notepad .\BlazorWpfSample.csproj
開いたファイルは次のようになっています。
<Project Sdk="Microsoft.NET.Sdk">

  <PropertyGroup>
    <OutputType>WinExe</OutputType>
    <TargetFramework>net6.0-windows</TargetFramework>
    <Nullable>enable</Nullable>
    <UseWPF>true</UseWPF>
  </PropertyGroup>

</Project>
この先頭の Sdk 部分を Microsoft.NET.Sdk.Razor と変更します。
<Project Sdk="Microsoft.NET.Sdk.Razor">

  <PropertyGroup>
    <OutputType>WinExe</OutputType>
    <TargetFramework>net6.0-windows</TargetFramework>
    <Nullable>enable</Nullable>
    <UseWPF>true</UseWPF>
  </PropertyGroup>

</Project>
Blazor ソースファイルを作成
プロジェクト内に Blazor 部分となる 4 つのソースファイルを追加します。
mkdir wwwroot
mkdir wwwroot\css
"@using Microsoft.AspNetCore.Components.Web"  | Out-File -Encoding utf8 _Imports.razor
"<!DOCTYPE html>`n<html lang=`"en`">`n<head>`n    <meta charset=`"utf-8`" />`n    <meta name=`"viewport`" content=`"width=device-width, initial-scale=1.0`" />`n    <title>WinFormsBlazor</title>`n    <base href=`"/`" />`n    <link href=`"css/app.css`" rel=`"stylesheet`" />`n    <link href=`"WinFormsBlazor.styles.css`" rel=`"stylesheet`" />`n</head>`n`n<body>`n`n    <div id=`"app`">Loading...</div>`n`n    <div id=`"blazor-error-ui`">`n        An unhandled error has occurred.`n        <a href=`"`" class=`"reload`">Reload</a>`n        <a class=`"dismiss`">🗙</a>`n    </div>`n`n    <script src=`"_framework/blazor.webview.js`"></script>`n`n</body>`n`n</html>" | Out-File -Encoding utf8 wwwroot/index.html
"html, body {`n    font-family: 'Helvetica Neue', Helvetica, Arial, sans-serif;`n}`n`n.valid.modified:not([type=checkbox]) {`n    outline: 1px solid #26b050;`n}`n`n.invalid {`n    outline: 1px solid red;`n}`n`n.validation-message {`n    color: red;`n}`n`n#blazor-error-ui {`n    background: lightyellow;`n    bottom: 0;`n    box-shadow: 0 -1px 2px rgba(0, 0, 0, 0.2);`n    display: none;`n    left: 0;`n    padding: 0.6rem 1.25rem 0.7rem 1.25rem;`n    position: fixed;`n    width: 100%;`n    z-index: 1000;`n}`n`n    #blazor-error-ui .dismiss {`n        cursor: pointer;`n        position: absolute;`n        right: 0.75rem;`n        top: 0.5rem;`n    }"  | Out-File -Encoding utf8 wwwroot/css/app.css
"<h1>Counter</h1>`n`n<p>Current count: @currentCount</p>`n`n<button class=`"btn btn-primary`" @onclick=`"IncrementCount`">Click me</button>`n`n@code {`n    private int currentCount = 0;`n`n    private void IncrementCount()`n    {`n        currentCount++;`n    }`n}"  | Out-File -Encoding utf8 Counter.razor
次の 4 ファイルが作れているはずです。
ここで行っているファイル作成方法については次の記事に。
出来上がったファイル
_Imports.razor
@using Microsoft.AspNetCore.Components.Web
wwwroot/index.html
<!DOCTYPE html>
<html lang="en">
<head>
    <meta charset="utf-8" />
    <meta name="viewport" content="width=device-width, initial-scale=1.0" />
    <title>WinFormsBlazor</title>
    <base href="/" />
    <link href="css/app.css" rel="stylesheet" />
    <link href="WinFormsBlazor.styles.css" rel="stylesheet" />
</head>

<body>

    <div id="app">Loading...</div>

    <div id="blazor-error-ui">
        An unhandled error has occurred.
        <a href="" class="reload">Reload</a>
        <a class="dismiss">🗙</a>
    </div>

    <script src="_framework/blazor.webview.js"></script>

</body>

</html>
wwwroot/css/app.css
html, body {
    font-family: 'Helvetica Neue', Helvetica, Arial, sans-serif;
}

.valid.modified:not([type=checkbox]) {
    outline: 1px solid #26b050;
}

.invalid {
    outline: 1px solid red;
}

.validation-message {
    color: red;
}

#blazor-error-ui {
    background: lightyellow;
    bottom: 0;
    box-shadow: 0 -1px 2px rgba(0, 0, 0, 0.2);
    display: none;
    left: 0;
    padding: 0.6rem 1.25rem 0.7rem 1.25rem;
    position: fixed;
    width: 100%;
    z-index: 1000;
}

#blazor-error-ui .dismiss {
    cursor: pointer;
    position: absolute;
    right: 0.75rem;
    top: 0.5rem;
}
Counter.razor
<h1>Counter</h1>

<p>Current count: @currentCount</p>

<button class="btn btn-primary" @onclick="IncrementCount">Click me</button>

@code {
    private int currentCount = 0;

    private void IncrementCount()
    {
        currentCount++;
    }
}
画面のコードを編集
画面の UI 定義を開きます。
> notepad MainWindow.xaml
開いたファイルはこんな感じになっているはずです。
<Window x:Class="BlazorWpfSample.MainWindow"
        xmlns="http://schemas.microsoft.com/winfx/2006/xaml/presentation"
        xmlns:x="http://schemas.microsoft.com/winfx/2006/xaml"
        xmlns:d="http://schemas.microsoft.com/expression/blend/2008"
        xmlns:mc="http://schemas.openxmlformats.org/markup-compatibility/2006"
        xmlns:local="clr-namespace:BlazorWpfSample"
        mc:Ignorable="d"
        Title="MainWindow" Height="450" Width="800">
    <Grid>

    </Grid>
</Window>
このファイルに次の名前空間と要素を追加します。
xmlns:blazor="clr-namespace:Microsoft.AspNetCore.Components.WebView.Wpf;assembly=Microsoft.AspNetCore.Components.WebView.Wpf"
<blazor:BlazorWebView HostPage="wwwroot\index.html" Services="{DynamicResource services}">
    <blazor:BlazorWebView.RootComponents>
        <blazor:RootComponent Selector="#app" ComponentType="{x:Type local:Counter}" />
    </blazor:BlazorWebView.RootComponents>
</blazor:BlazorWebView>
ファイルはこんな感じになります。
MainWindow.xaml
<Window x:Class="BlazorWpfSample.MainWindow"
        xmlns="http://schemas.microsoft.com/winfx/2006/xaml/presentation"
        xmlns:x="http://schemas.microsoft.com/winfx/2006/xaml"
        xmlns:d="http://schemas.microsoft.com/expression/blend/2008"
        xmlns:mc="http://schemas.openxmlformats.org/markup-compatibility/2006"
        xmlns:blazor="clr-namespace:Microsoft.AspNetCore.Components.WebView.Wpf;assembly=Microsoft.AspNetCore.Components.WebView.Wpf"
        xmlns:local="clr-namespace:BlazorWpfSample"
        mc:Ignorable="d"
        Title="MainWindow" Height="450" Width="800">
    <Grid>
        <blazor:BlazorWebView HostPage="wwwroot\index.html" Services="{DynamicResource services}">
            <blazor:BlazorWebView.RootComponents>
                <blazor:RootComponent Selector="#app" ComponentType="{x:Type local:Counter}" />
            </blazor:BlazorWebView.RootComponents>
        </blazor:BlazorWebView>
    </Grid>
</Window>
画面のビハインドコードを開きます。
> notepad MainWindow.xaml.cs
開いたファイルはこんな感じになっているはずです。
using System;
using System.Collections.Generic;
using System.Linq;
using System.Text;
using System.Threading.Tasks;
using System.Windows;
using System.Windows.Controls;
using System.Windows.Data;
using System.Windows.Documents;
using System.Windows.Input;
using System.Windows.Media;
using System.Windows.Media.Imaging;
using System.Windows.Navigation;
using System.Windows.Shapes;

namespace BlazorWpfSample
{
    /// <summary>
    /// Interaction logic for MainWindow.xaml
    /// </summary>
    public partial class MainWindow : Window
    {
        public MainWindow()
        {
            InitializeComponent();
        }
    }
}
このファイルに using を追加します。
using Microsoft.Extensions.DependencyInjection;
コンストラクタの先頭に次の設定を行うコードを追加します。
var serviceCollection = new ServiceCollection();
serviceCollection.AddWpfBlazorWebView();
Resources.Add("services", serviceCollection.BuildServiceProvider());
ファイルはこんな感じになります。
MainWindow.xaml.cs
using System;
using System.Collections.Generic;
using System.Linq;
using System.Text;
using System.Threading.Tasks;
using System.Windows;
using System.Windows.Controls;
using System.Windows.Data;
using System.Windows.Documents;
using System.Windows.Input;
using System.Windows.Media;
using System.Windows.Media.Imaging;
using System.Windows.Navigation;
using System.Windows.Shapes;
using Microsoft.Extensions.DependencyInjection;

namespace BlazorWpfSample
{
    /// <summary>
    /// Interaction logic for MainWindow.xaml
    /// </summary>
    public partial class MainWindow : Window
    {
        public MainWindow()
        {
            var serviceCollection = new ServiceCollection();
            serviceCollection.AddWpfBlazorWebView();
            Resources.Add("services", serviceCollection.BuildServiceProvider());

            InitializeComponent();
        }
    }
}
NuGet パッケージのインストール
prerelease 版の NuGet パッケージをインストールします。
> dotnet add package Microsoft.AspNetCore.Components.WebView.Wpf --prerelease
□ 実行
実行はプロジェクト ファイル (.csproj) のある場所で dotnet run 。
> dotnet run
WPF アプリの中で Blazor が動きました。

これで Blazor Hybrid (WPF) のプロジェクトを作成して実行することができました。
□ Visual Studio
ワークロード .NET デスクトップ開発 が必要です。
Visual Studio の場合はプロジェクトの作成から。

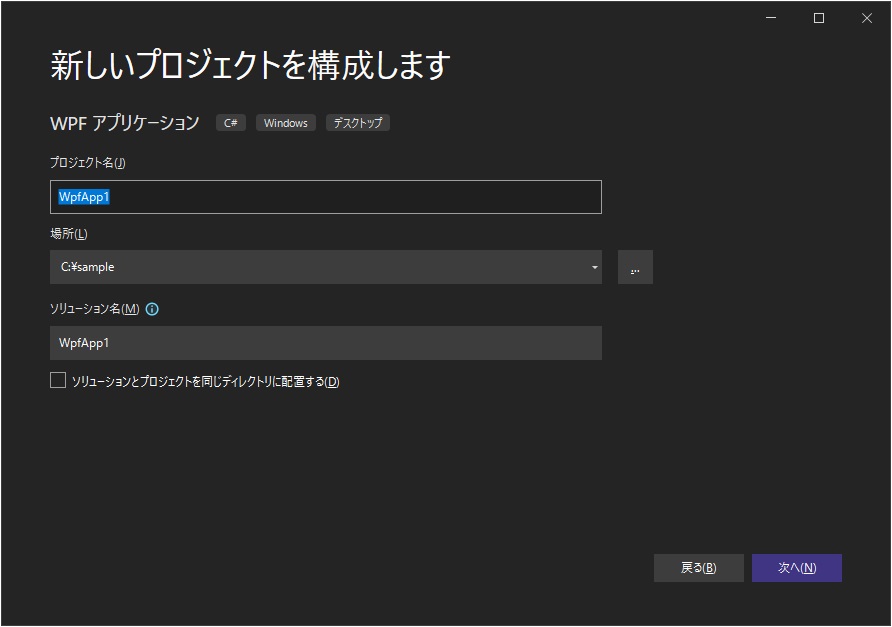
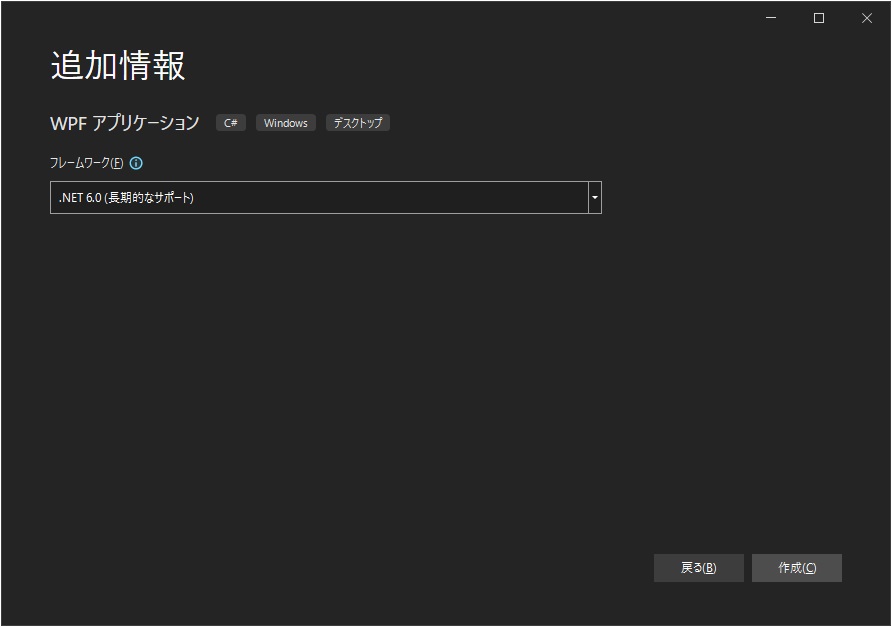
プロジェクト (ソリューション) が作成され、Visual Studio で開かれます。

プロジェクトファイルを編集します。
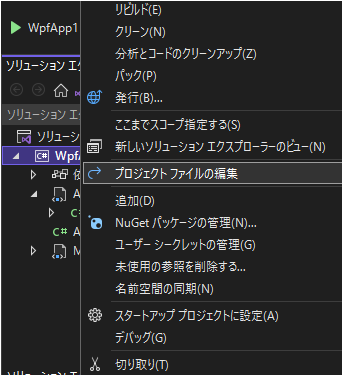
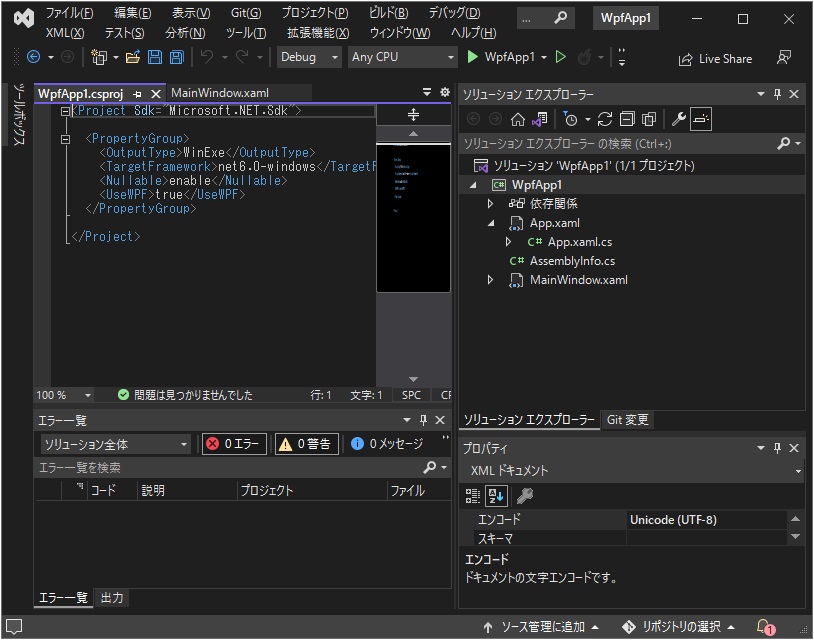
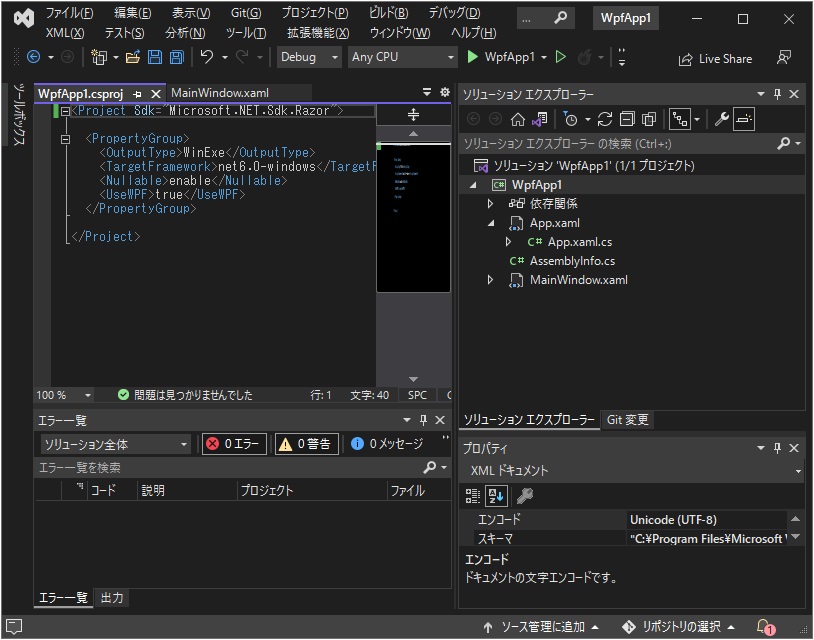
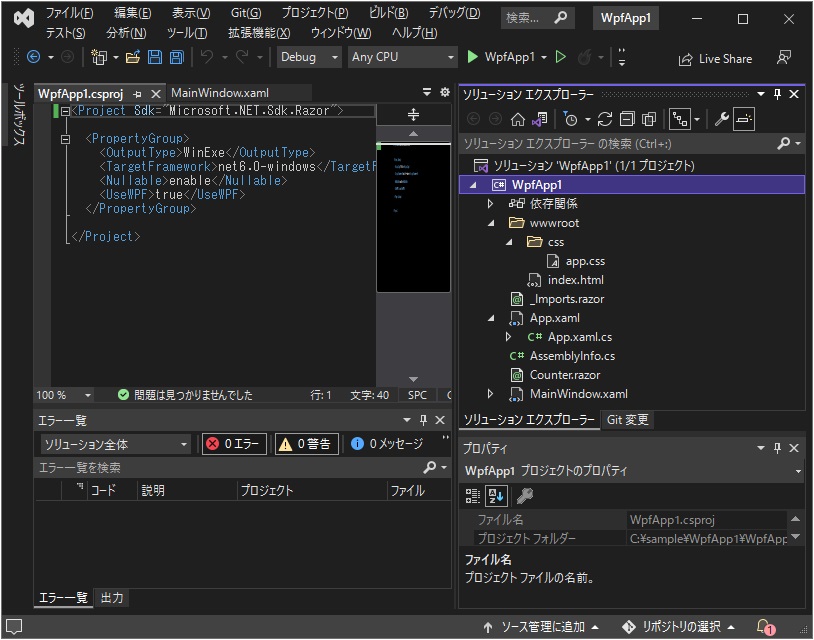
コマンドラインの時と同様に Blazor の 4 ファイルを追加します。
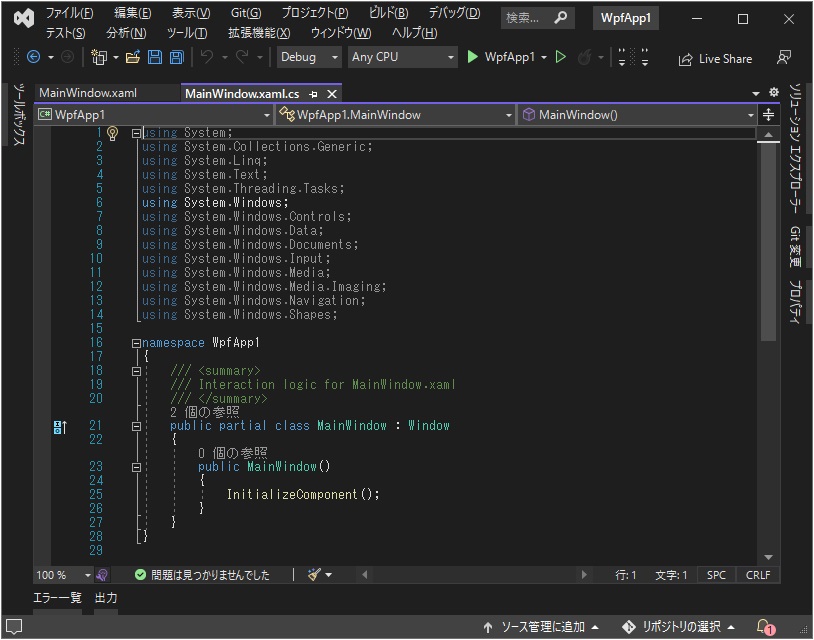
 画面のソースも同様に編集します。



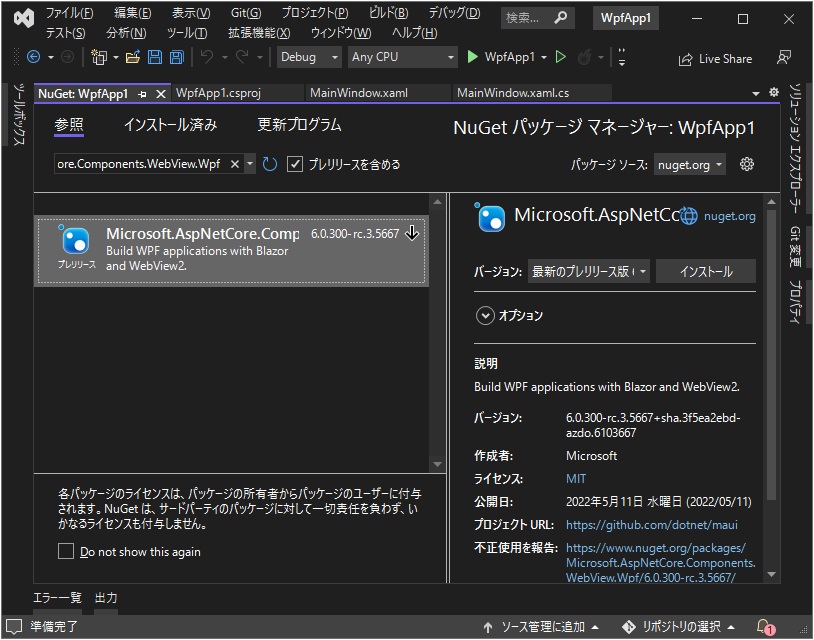
NuGet パッケージを追加します。プレリリースを含める のチェックを忘れないでください。

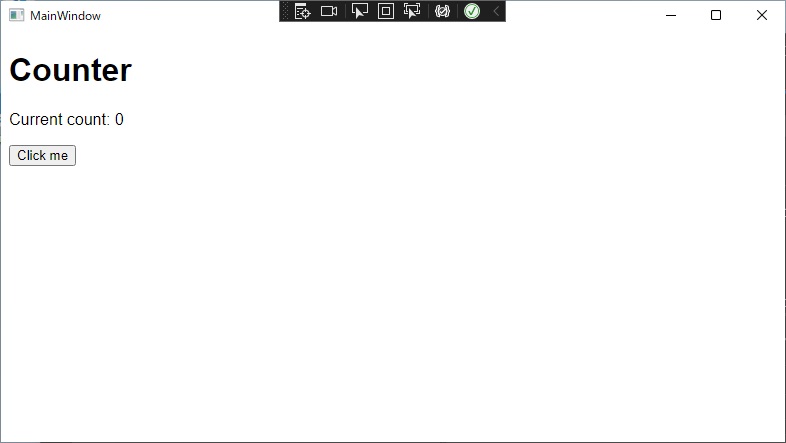
デバッグ実行で Windows フォームアプリの中で Blazor が動きました。
□ 簡単ですね
簡単ですね。
■ Mobile Blazor Bindings プロジェクトの作り方
Blazor には 7 つのプロジェクト タイプがあります。
今回は少し複雑な Mobile Blazor Bindings プロジェクトを作ってみたいと思います。
参考
□ 準備
□ Visual Sudio
Visual Studio をインストールします。 ワークロード ASP.NET と Web 開発 と .NET によるモバイル開発 が必要です。
□ プロジェクトテンプレート
プロジェクトテンプレートは次のコマンドで探せます。
> dotnet new mobileblazorbindings --search
実行結果
テンプレートを探しています...
テンプレートソースからの一致: NuGet.org
これらのテンプレートは、入力: 'mobileblazorbindings' と一致しました

テンプレート名            短い名前              作成       言語  パッケージ                                ダウンロード
------------------------  --------------------  ---------  ----  ----------------------------------------  ------------
Experimental Mobile B...  mobileblazorbindings  Microsoft  [C#]  Microsoft.MobileBlazorBindings.Templates           16k


テンプレートを使用するには、次のコマンドを実行してパッケージをインストールします。
   dotnet new --install <PACKAGE_ID>
例:
   dotnet new --install Microsoft.MobileBlazorBindings.Templates
ただし今回は プレビュー バージョンのパッケージが必要なので少し手を加える必要があります。具体的には次のコマンドになります。
dotnet new --install Microsoft.MobileBlazorBindings.Templates::0.5.50-preview
□ dotnet command
コマンドで作成すると手ばやいです。
> dotnet new mobileblazorbindings -o SampleMobileBlazorBindingsApp
実行は Visual Studio で行います。 。
> &"C:\Program Files\Microsoft Visual Studio\2022\Preview\Common7\IDE\devenv.exe" .\SampleMobileBlazorBindingsApp\SampleMobileBlazorBindingsApp.sln
参考
□ Visual Studio
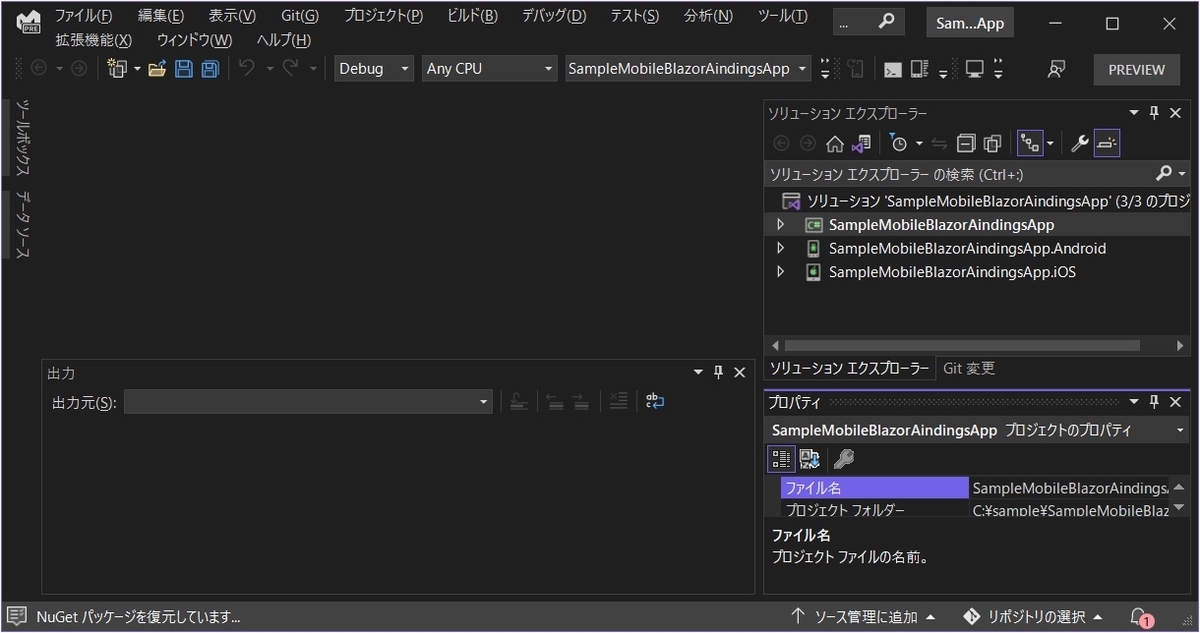
プロジェクト (ソリューション) が Visual Studio で開かれます。
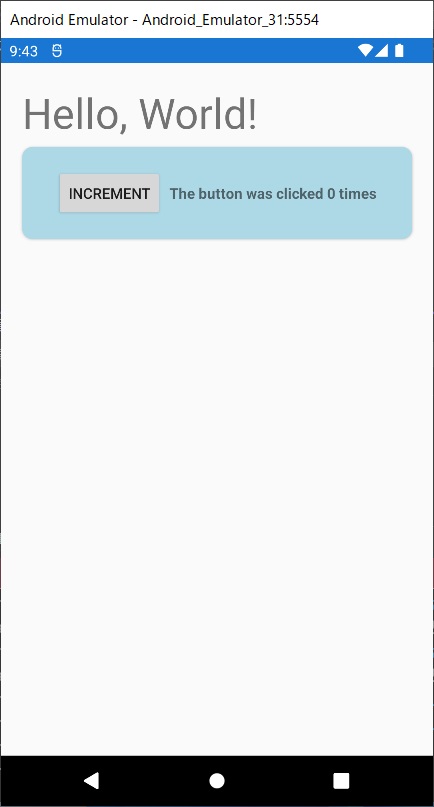
デバッグ実行で Android エミュレーターが起動し、アプリが開きます。
□ 簡単ですね
簡単ですね。
■ Mobile Blazor Bindings (Hybrid) プロジェクトの作り方
少し複雑な Mobile Blazor Bindings (Hybrid) プロジェクトを作ってみたいと思います。
参考
□ 準備
□ Visual Sudio
Visual Studio をインストールします。 ワークロード ASP.NET と Web 開発 と .NET によるモバイル開発 が必要です。
□ プロジェクトテンプレート
プロジェクトテンプレートは次のコマンドで探せます。
> dotnet new blazorhybrid --search
実行結果
テンプレートを探しています...
テンプレートソースからの一致: NuGet.org
これらのテンプレートは、入力: 'blazorhybrid' と一致しました

テンプレート名                    短い名前      作成       言語  パッケージ                                ダウンロード
--------------------------------  ------------  ---------  ----  ----------------------------------------  ------------
Experimental Mobile Blazor Bi...  blazorhybrid  Microsoft  [C#]  Microsoft.MobileBlazorBindings.Templates           16k


テンプレートを使用するには、次のコマンドを実行してパッケージをインストールします。
   dotnet new --install <PACKAGE_ID>
例:
   dotnet new --install Microsoft.MobileBlazorBindings.Templates
ただし今回は プレビュー バージョンのパッケージが必要なので少し手を加える必要があります。具体的には次のコマンドになります。
dotnet new --install Microsoft.MobileBlazorBindings.Templates::0.5.50-preview
□ dotnet command
コマンドで作成すると手ばやいです。
> dotnet new blazorhybrid -o SampleBlazorHybrid
実行は Visual Studio で行います。
> &"C:\Program Files\Microsoft Visual Studio\2022\Preview\Common7\IDE\devenv.exe" .\SampleBlazorHybrid\SampleBlazorHybrid.sln
参考
□ Visual Studio
プロジェクト (ソリューション) が Visual Studio で開かれます。
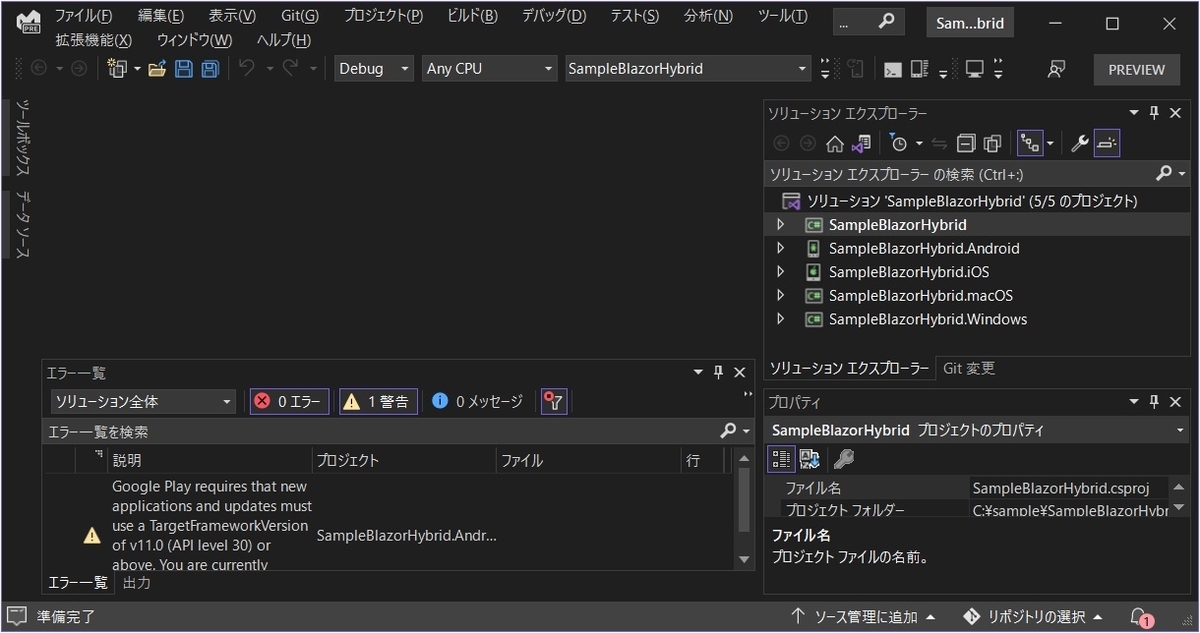
プロジェクトがモバイルとデスクトップの両方のものが作られていることがわかります。
□ Android
まずは Android プロジェクトを実行してみます。
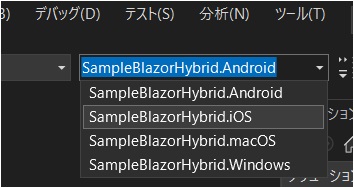
デバッグ実行で Android エミュレーターが起動し、アプリが開きます。

□ Windows
続いて Windows のデスクトップを実行してみます。
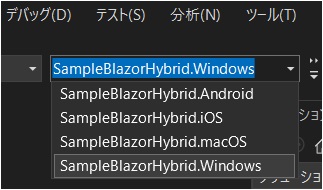
ここでエラーが出ることがあります。

---------------------------
SampleBlazorHybrid.Windows.exe
---------------------------
To run this application, you must install .NET Core.

Would you like to download it now?
---------------------------
はい(Y)   いいえ(N)
---------------------------
対策
.NET Core 3.1 をインストールします。そうするとインストール後に Android プロジェクトがビルドに失敗するようになるので、ひとまずアンロードしておきます。
rksoftware.hatenablog.com
改めて Windows のデスクトップを実行してみます。

起動しました。しかし Blazor 部分がエラーになってしまっています。

申し訳ございません。このページに到達できません
http://0.0.0.0 の Web ページに問題が発生しているか、新しい Web ページに完全に移動された可能性があります。
ERR_ADDRESS_INVALID
対策
NuGet パッケージの更新と追加を行います。
- Xamarin.Forms を最新に更新
- WebView2 をインストール
再度実行します。
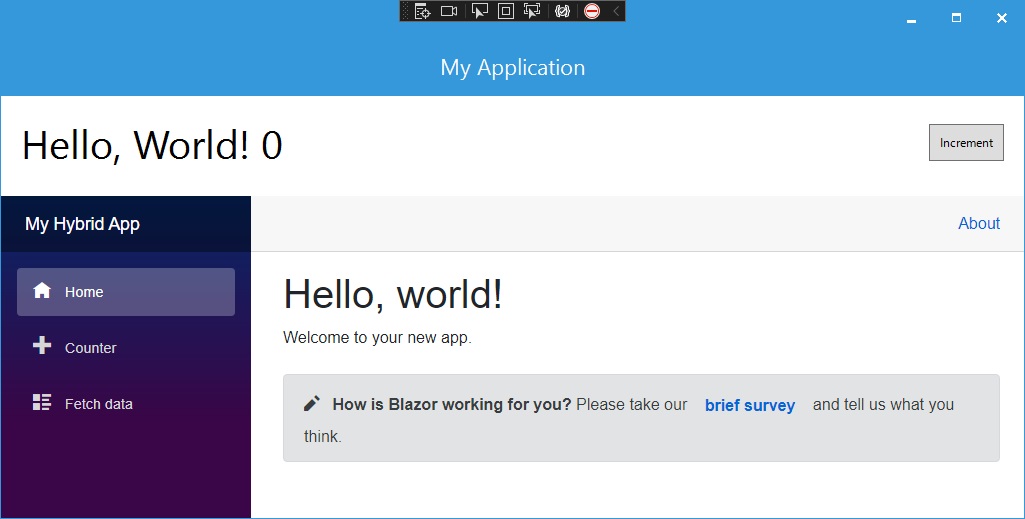
実行できました。
□ 簡単ですね
簡単ですね。