Blazor には 7 つのプロジェクト タイプがあります。
今回は少し複雑な Blazor Hybrid (WPF) プロジェクトを作ってみたいと思います。
参考
■ dotnet command
コマンドで作成すると手ばやいです。
> dotnet new wpf -o BlazorWpfSample
> cd .\BlazorWpfSample\
□ .csproj ファイルの編集
少し複雑なので .csproj ファイルを編集します。
テキストエディタで .csproj ファイルを開きます (ここではメモ帳で開いています)。
> notepad .\BlazorWpfSample.csproj
開いたファイルは次のようになっています。
<Project Sdk="Microsoft.NET.Sdk">

  <PropertyGroup>
    <OutputType>WinExe</OutputType>
    <TargetFramework>net6.0-windows</TargetFramework>
    <Nullable>enable</Nullable>
    <UseWPF>true</UseWPF>
  </PropertyGroup>

</Project>
この先頭の Sdk 部分を Microsoft.NET.Sdk.Razor と変更します。
<Project Sdk="Microsoft.NET.Sdk.Razor">

  <PropertyGroup>
    <OutputType>WinExe</OutputType>
    <TargetFramework>net6.0-windows</TargetFramework>
    <Nullable>enable</Nullable>
    <UseWPF>true</UseWPF>
  </PropertyGroup>

</Project>
□ Blazor ソースファイルを作成
プロジェクト内に Blazor 部分となる 4 つのソースファイルを追加します。
mkdir wwwroot
mkdir wwwroot\css
"@using Microsoft.AspNetCore.Components.Web"  | Out-File -Encoding utf8 _Imports.razor
"<!DOCTYPE html>`n<html lang=`"en`">`n<head>`n    <meta charset=`"utf-8`" />`n    <meta name=`"viewport`" content=`"width=device-width, initial-scale=1.0`" />`n    <title>WinFormsBlazor</title>`n    <base href=`"/`" />`n    <link href=`"css/app.css`" rel=`"stylesheet`" />`n    <link href=`"WinFormsBlazor.styles.css`" rel=`"stylesheet`" />`n</head>`n`n<body>`n`n    <div id=`"app`">Loading...</div>`n`n    <div id=`"blazor-error-ui`">`n        An unhandled error has occurred.`n        <a href=`"`" class=`"reload`">Reload</a>`n        <a class=`"dismiss`">🗙</a>`n    </div>`n`n    <script src=`"_framework/blazor.webview.js`"></script>`n`n</body>`n`n</html>" | Out-File -Encoding utf8 wwwroot/index.html
"html, body {`n    font-family: 'Helvetica Neue', Helvetica, Arial, sans-serif;`n}`n`n.valid.modified:not([type=checkbox]) {`n    outline: 1px solid #26b050;`n}`n`n.invalid {`n    outline: 1px solid red;`n}`n`n.validation-message {`n    color: red;`n}`n`n#blazor-error-ui {`n    background: lightyellow;`n    bottom: 0;`n    box-shadow: 0 -1px 2px rgba(0, 0, 0, 0.2);`n    display: none;`n    left: 0;`n    padding: 0.6rem 1.25rem 0.7rem 1.25rem;`n    position: fixed;`n    width: 100%;`n    z-index: 1000;`n}`n`n    #blazor-error-ui .dismiss {`n        cursor: pointer;`n        position: absolute;`n        right: 0.75rem;`n        top: 0.5rem;`n    }"  | Out-File -Encoding utf8 wwwroot/css/app.css
"<h1>Counter</h1>`n`n<p>Current count: @currentCount</p>`n`n<button class=`"btn btn-primary`" @onclick=`"IncrementCount`">Click me</button>`n`n@code {`n    private int currentCount = 0;`n`n    private void IncrementCount()`n    {`n        currentCount++;`n    }`n}"  | Out-File -Encoding utf8 Counter.razor
次の 4 ファイルが作れているはずです。
ここで行っているファイル作成方法については次の記事に。
□ 出来上がったファイル
_Imports.razor
@using Microsoft.AspNetCore.Components.Web
wwwroot/index.html
<!DOCTYPE html>
<html lang="en">
<head>
    <meta charset="utf-8" />
    <meta name="viewport" content="width=device-width, initial-scale=1.0" />
    <title>WinFormsBlazor</title>
    <base href="/" />
    <link href="css/app.css" rel="stylesheet" />
    <link href="WinFormsBlazor.styles.css" rel="stylesheet" />
</head>

<body>

    <div id="app">Loading...</div>

    <div id="blazor-error-ui">
        An unhandled error has occurred.
        <a href="" class="reload">Reload</a>
        <a class="dismiss">🗙</a>
    </div>

    <script src="_framework/blazor.webview.js"></script>

</body>

</html>
wwwroot/css/app.css
html, body {
    font-family: 'Helvetica Neue', Helvetica, Arial, sans-serif;
}

.valid.modified:not([type=checkbox]) {
    outline: 1px solid #26b050;
}

.invalid {
    outline: 1px solid red;
}

.validation-message {
    color: red;
}

#blazor-error-ui {
    background: lightyellow;
    bottom: 0;
    box-shadow: 0 -1px 2px rgba(0, 0, 0, 0.2);
    display: none;
    left: 0;
    padding: 0.6rem 1.25rem 0.7rem 1.25rem;
    position: fixed;
    width: 100%;
    z-index: 1000;
}

#blazor-error-ui .dismiss {
    cursor: pointer;
    position: absolute;
    right: 0.75rem;
    top: 0.5rem;
}
Counter.razor
<h1>Counter</h1>

<p>Current count: @currentCount</p>

<button class="btn btn-primary" @onclick="IncrementCount">Click me</button>

@code {
    private int currentCount = 0;

    private void IncrementCount()
    {
        currentCount++;
    }
}
□ 画面のコードを編集
画面の UI 定義を開きます。
> notepad MainWindow.xaml
開いたファイルはこんな感じになっているはずです。
<Window x:Class="BlazorWpfSample.MainWindow"
        xmlns="http://schemas.microsoft.com/winfx/2006/xaml/presentation"
        xmlns:x="http://schemas.microsoft.com/winfx/2006/xaml"
        xmlns:d="http://schemas.microsoft.com/expression/blend/2008"
        xmlns:mc="http://schemas.openxmlformats.org/markup-compatibility/2006"
        xmlns:local="clr-namespace:BlazorWpfSample"
        mc:Ignorable="d"
        Title="MainWindow" Height="450" Width="800">
    <Grid>

    </Grid>
</Window>
このファイルに次の名前空間と要素を追加します。
xmlns:blazor="clr-namespace:Microsoft.AspNetCore.Components.WebView.Wpf;assembly=Microsoft.AspNetCore.Components.WebView.Wpf"
<blazor:BlazorWebView HostPage="wwwroot\index.html" Services="{DynamicResource services}">
    <blazor:BlazorWebView.RootComponents>
        <blazor:RootComponent Selector="#app" ComponentType="{x:Type local:Counter}" />
    </blazor:BlazorWebView.RootComponents>
</blazor:BlazorWebView>
ファイルはこんな感じになります。
MainWindow.xaml
<Window x:Class="BlazorWpfSample.MainWindow"
        xmlns="http://schemas.microsoft.com/winfx/2006/xaml/presentation"
        xmlns:x="http://schemas.microsoft.com/winfx/2006/xaml"
        xmlns:d="http://schemas.microsoft.com/expression/blend/2008"
        xmlns:mc="http://schemas.openxmlformats.org/markup-compatibility/2006"
        xmlns:blazor="clr-namespace:Microsoft.AspNetCore.Components.WebView.Wpf;assembly=Microsoft.AspNetCore.Components.WebView.Wpf"
        xmlns:local="clr-namespace:BlazorWpfSample"
        mc:Ignorable="d"
        Title="MainWindow" Height="450" Width="800">
    <Grid>
        <blazor:BlazorWebView HostPage="wwwroot\index.html" Services="{DynamicResource services}">
            <blazor:BlazorWebView.RootComponents>
                <blazor:RootComponent Selector="#app" ComponentType="{x:Type local:Counter}" />
            </blazor:BlazorWebView.RootComponents>
        </blazor:BlazorWebView>
    </Grid>
</Window>
画面のビハインドコードを開きます。
> notepad MainWindow.xaml.cs
開いたファイルはこんな感じになっているはずです。
using System;
using System.Collections.Generic;
using System.Linq;
using System.Text;
using System.Threading.Tasks;
using System.Windows;
using System.Windows.Controls;
using System.Windows.Data;
using System.Windows.Documents;
using System.Windows.Input;
using System.Windows.Media;
using System.Windows.Media.Imaging;
using System.Windows.Navigation;
using System.Windows.Shapes;

namespace BlazorWpfSample
{
    /// <summary>
    /// Interaction logic for MainWindow.xaml
    /// </summary>
    public partial class MainWindow : Window
    {
        public MainWindow()
        {
            InitializeComponent();
        }
    }
}
このファイルに using を追加します。
using Microsoft.Extensions.DependencyInjection;
コンストラクタの先頭に次の設定を行うコードを追加します。
var serviceCollection = new ServiceCollection();
serviceCollection.AddWpfBlazorWebView();
Resources.Add("services", serviceCollection.BuildServiceProvider());
ファイルはこんな感じになります。
MainWindow.xaml.cs
using System;
using System.Collections.Generic;
using System.Linq;
using System.Text;
using System.Threading.Tasks;
using System.Windows;
using System.Windows.Controls;
using System.Windows.Data;
using System.Windows.Documents;
using System.Windows.Input;
using System.Windows.Media;
using System.Windows.Media.Imaging;
using System.Windows.Navigation;
using System.Windows.Shapes;
using Microsoft.Extensions.DependencyInjection;

namespace BlazorWpfSample
{
    /// <summary>
    /// Interaction logic for MainWindow.xaml
    /// </summary>
    public partial class MainWindow : Window
    {
        public MainWindow()
        {
            var serviceCollection = new ServiceCollection();
            serviceCollection.AddWpfBlazorWebView();
            Resources.Add("services", serviceCollection.BuildServiceProvider());

            InitializeComponent();
        }
    }
}
□ NuGet パッケージのインストール
prerelease 版の NuGet パッケージをインストールします。
> dotnet add package Microsoft.AspNetCore.Components.WebView.Wpf --prerelease
□ 実行
実行はプロジェクト ファイル (.csproj) のある場所で dotnet run 。
> dotnet run
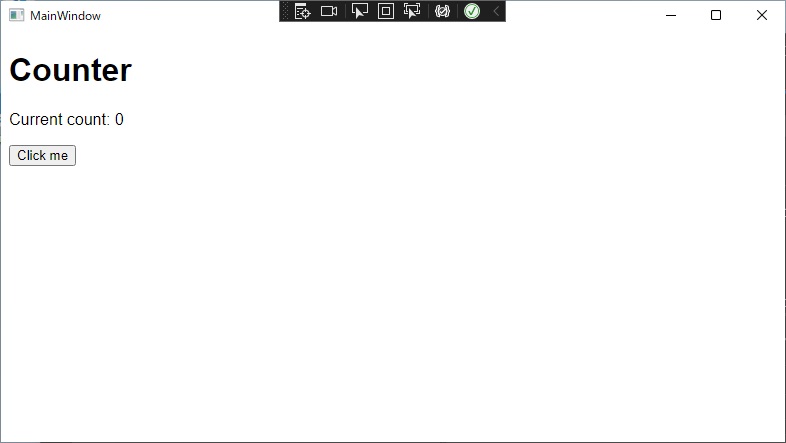
WPF アプリの中で Blazor が動きました。

これで Blazor Hybrid (WPF) のプロジェクトを作成して実行することができました。
■ Visual Studio
ワークロード .NET デスクトップ開発 が必要です。
Visual Studio の場合はプロジェクトの作成から。

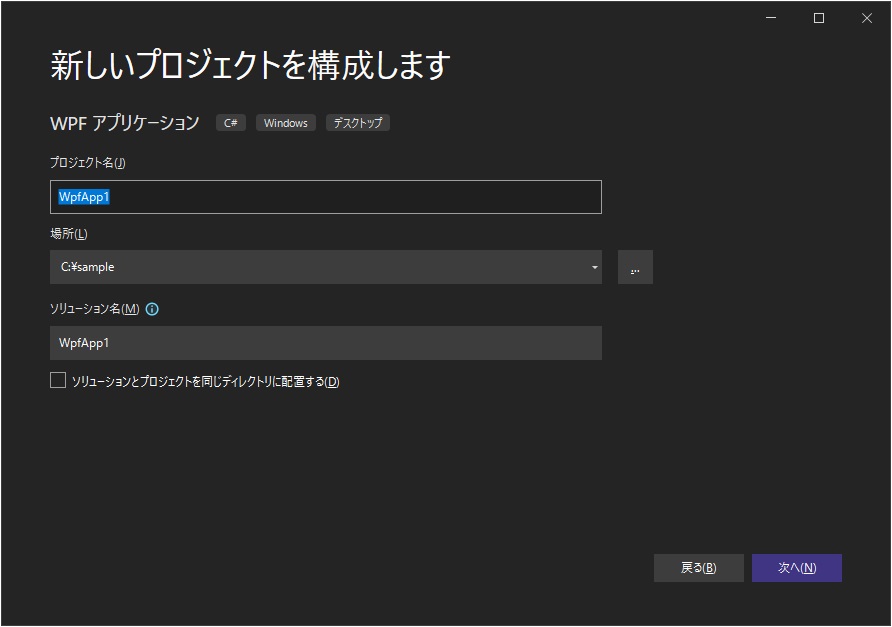
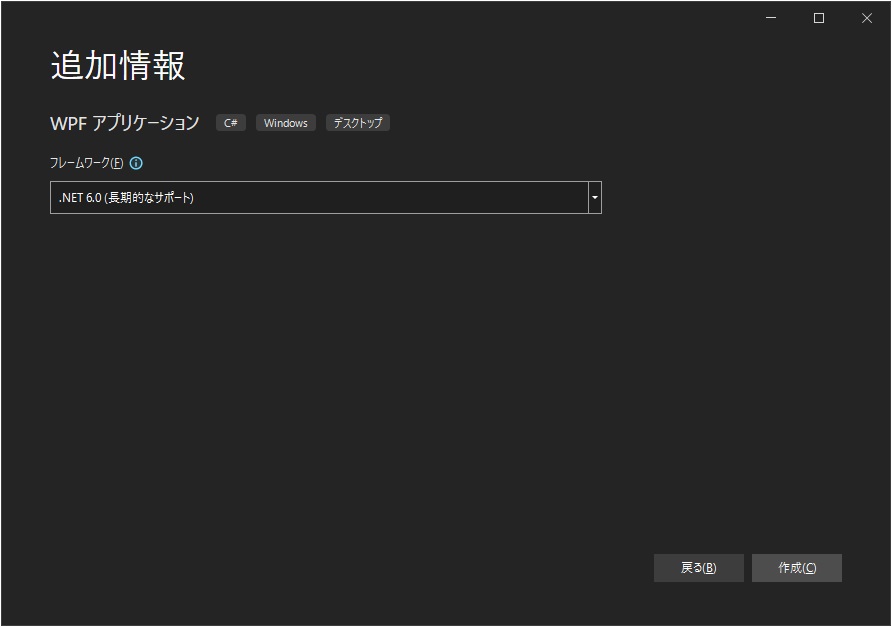
プロジェクト (ソリューション) が作成され、Visual Studio で開かれます。

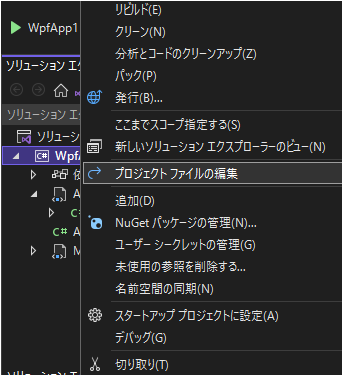
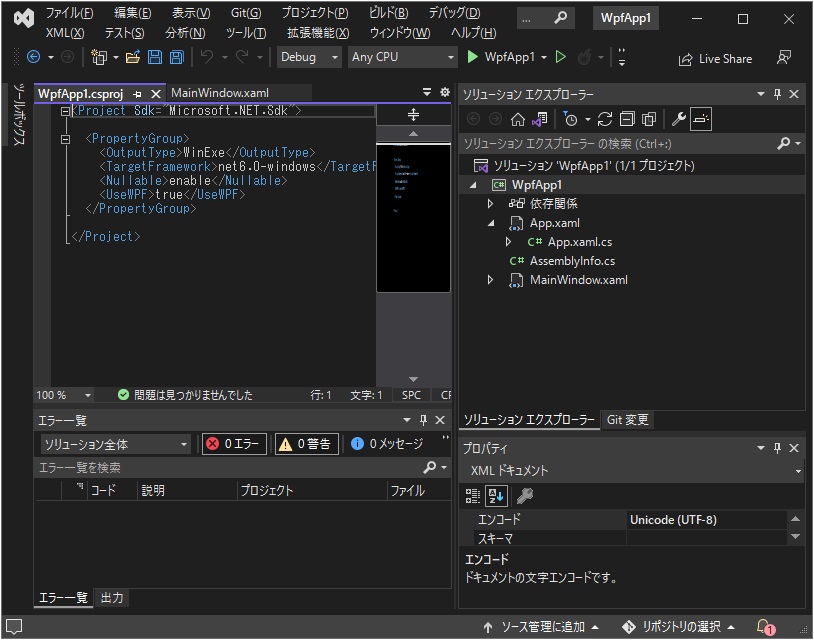
プロジェクトファイルを編集します。
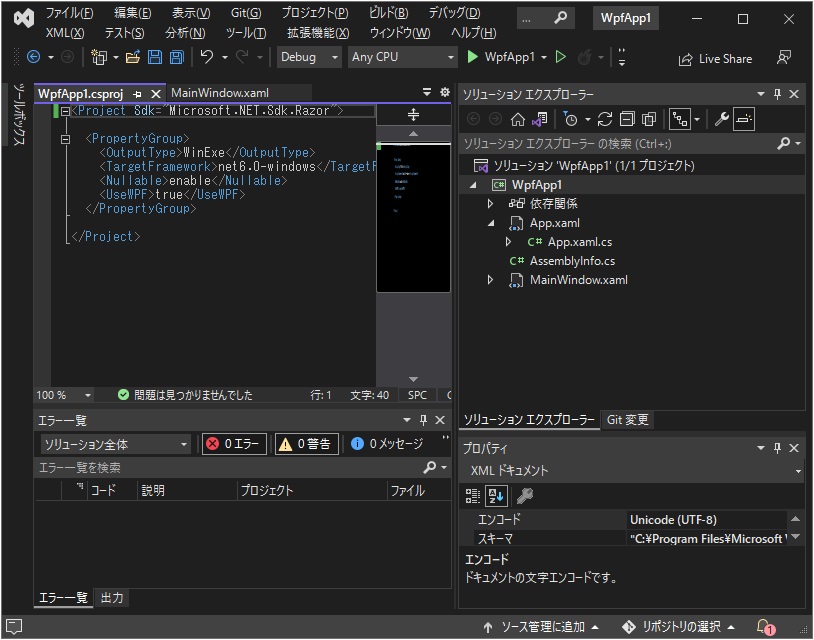
コマンドラインの時と同様に Blazor の 4 ファイルを追加します。
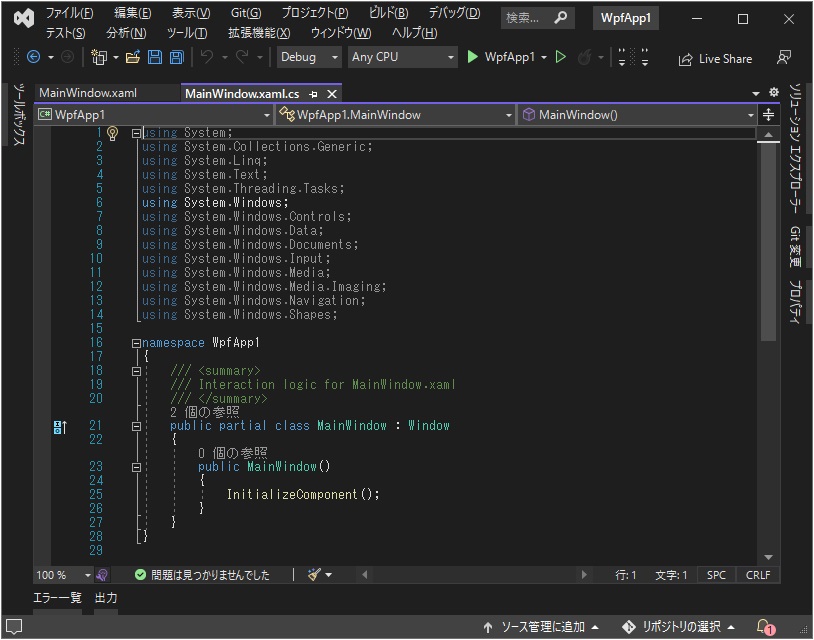
 画面のソースも同様に編集します。


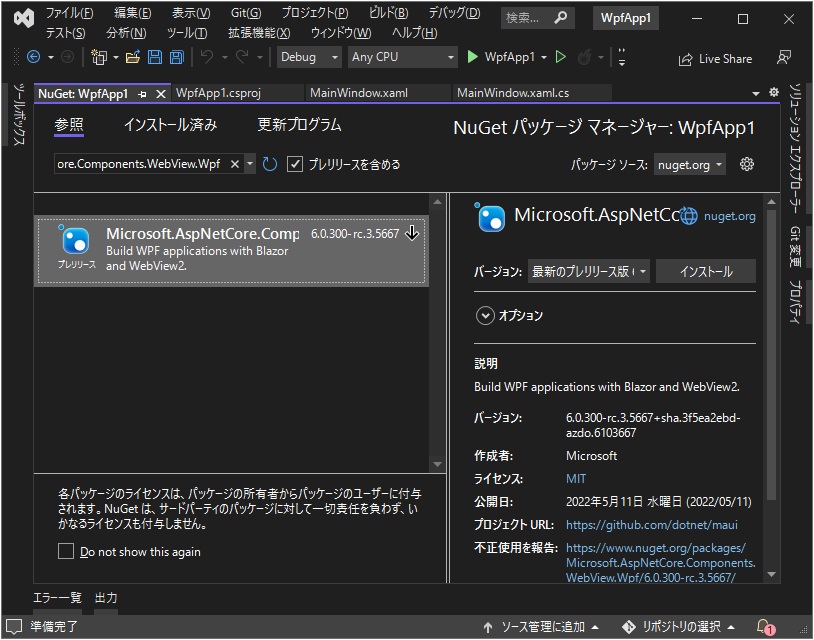
NuGet パッケージを追加します。プレリリースを含める のチェックを忘れないでください。

デバッグ実行で Windows フォームアプリの中で Blazor が動きました。
■ 簡単ですね
簡単ですね。