C# Dev Kit がリリースされたので見ていこうと思います。
C# Dev Kit はこちら。
前回の記事はこちら。
前後の記事の全部まとめはこちら。
https://rksoftware.hatenablog.com/entry/2023/10/21/140000
■ 前回の launch.json
前回 C# Dev Kit でプロジェクトを新規作成して実行までしたときの launch.json は次のようになっていました。
{
    // Use IntelliSense to learn about possible attributes.
    // Hover to view descriptions of existing attributes.
    // For more information, visit: https://go.microsoft.com/fwlink/?linkid=830387
    "version": "0.2.0",
    "configurations": [
        {
            "name": ".NET Core Launch (web)",
            "type": "coreclr",
            "request": "launch",
            "preLaunchTask": "build",
            "program": "${workspaceFolder}/bin/Debug/<target-framework>/<project-name.dll>",
            "args": [],
            "cwd": "${workspaceFolder}",
            "stopAtEntry": false,
            "serverReadyAction": {
                "action": "openExternally",
                "pattern": "\\bNow listening on:\\s+(https?://\\S+)"
            },
            "env": {
                "ASPNETCORE_ENVIRONMENT": "Development"
            },
            "sourceFileMap": {
                "/Views": "${workspaceFolder}/Views"
            }
        },

        {
            "type": "chrome",
            "request": "launch",
            "name": "Launch Chrome against localhost",
            "url": "http://localhost:8080",
            "webRoot": "${workspaceFolder}"
        }
    ]
}
これは [ Add configuration... ] した結果こうなったのですが、C# Dev Kit ではこの手順は不要なようです。
■ 今動いている状態
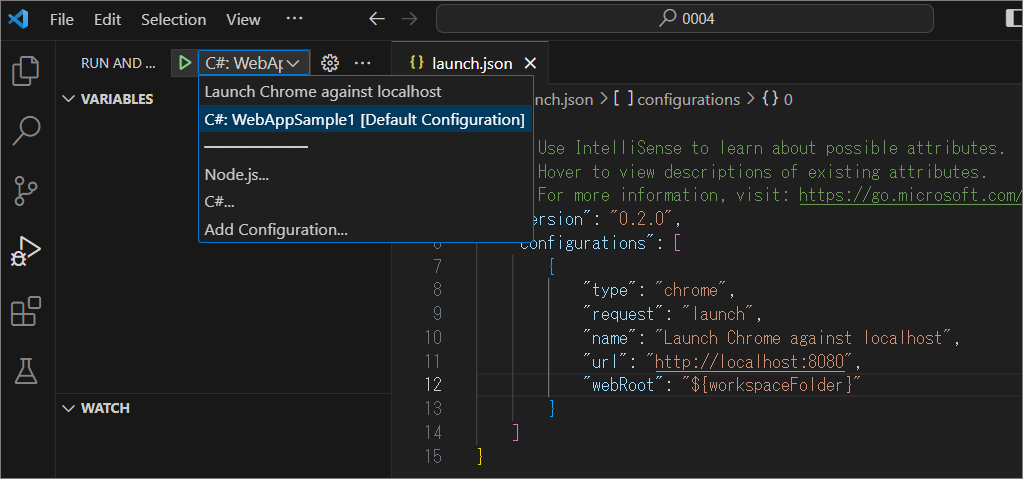
{
    // Use IntelliSense to learn about possible attributes.
    // Hover to view descriptions of existing attributes.
    // For more information, visit: https://go.microsoft.com/fwlink/?linkid=830387
    "version": "0.2.0",
    "configurations": [
        {
            "type": "chrome",
            "request": "launch",
            "name": "Launch Chrome against localhost",
            "url": "http://localhost:8080",
            "webRoot": "${workspaceFolder}"
        }
    ]
}
この状態で動きました。[ Add configuration... ] なしで、いきなり C# のところからプロジェクトを選べばいいようです。Visual Studio 派にうれしい仕様!
■ そのようなホストは不明です。
今回試している際に次のようなエラーが出て実行ができないことがありました。
そのようなホストは不明です。
[Window Title]
Visual Studio Code

[Main Instruction]
Build Failures

[Content]
'<ソリューションのパス>\WebAppSample1\WebAppSample1.csproj' failed to build. Would you like to continue and run the last successful build?

[Yes] [No]
■ 対策
ネットにつながっていない環境で試していたせいで、nuget が見られていないのが原因だったようです。ネットにつなげましょう。
■ 次回
ブレークポイントを設定して止めてみたいと思います。