rksoftware

Visual Studio とか C# とかが好きです

Uno Platform で はろーわーるど その6

Uno Platform の はろーわーるど 一連の記事の目次です

■ 今回の記事

Uno Platform のプロジェクトを作成し色々する記事を以前に書きました。

今回はプラットフォーム毎にコードなどを変えてみます。

■ C# コードをプラットフォーム毎に変える

#if XXXXX から #endif で囲まれた範囲が XXXXX のプラットフォーム向けのコンパイル時にのみ有効になります。

#if XXXXX

    // プラットフォーム固有の処理

#endif

XXXXX は Uno Platform のテンプレートでは次の様に設定されています。

プラットフォーム 条件付きコンパイルシンボル
WebAssembly __WASM__
UWP WINDOWS_UWP
Android __ANDROID__
iOS __IOS__

MainPage.xaml にプラットフォーム毎に表示テキストを変える TextBlock を画面に追加します。

        <TextBlock x:Name="platform" Margin="40" />

今回は画面の一番上に表示されるように

  <Grid Background="{ThemeResource ApplicationPageBackgroundThemeBrush}">
    <ScrollViewer>
      <StackPanel>

のすぐ下に追加します。
MainPage.xaml 全体は次のようになります。

<Page
    x:Class="UnoApp1.MainPage"
    xmlns="http://schemas.microsoft.com/winfx/2006/xaml/presentation"
    xmlns:x="http://schemas.microsoft.com/winfx/2006/xaml"
    xmlns:local="using:UnoApp1"
    xmlns:d="http://schemas.microsoft.com/expression/blend/2008"
    xmlns:mc="http://schemas.openxmlformats.org/markup-compatibility/2006"
    mc:Ignorable="d">

  <Grid Background="{ThemeResource ApplicationPageBackgroundThemeBrush}">
    <ScrollViewer>
      <StackPanel>
        <TextBlock x:Name="platform" Margin="40" />
        
        <TextBox x:Name="textBox1" Text="Hello! " Margin="5" />
        <TextBox x:Name="textBox2" Text="C# World!!" Margin="5" />
        <TextBlock x:Name="textBlock1" Margin="20" FontSize="30" />
        <Button Content="最初のボタン" Click="Button1_Click"/>

        <TextBox Text="{Binding Box1, Mode=TwoWay}" Margin="5" />
        <TextBox Text="{Binding Box2, Mode=TwoWay}" Margin="5" />
        <TextBlock Text="{Binding Block1, Mode=TwoWay}" Margin="20" FontSize="30" />
        <Button Command="{Binding Click}" Content="DataBinding のボタン"/>

        <StackPanel x:Name="panel2">
          <TextBox Text="{Binding Box21, Mode=TwoWay, UpdateSourceTrigger=PropertyChanged}" Margin="5" />
          <TextBox Text="{Binding Box22, Mode=TwoWay, UpdateSourceTrigger=PropertyChanged}" Margin="5" />
          <TextBlock Text="{Binding Block21}" Margin="20" FontSize="30" />
        </StackPanel>

        <ListView x:Name="listView" Height="150" Background="LightGray"
                  ItemsSource="{Binding}" SelectionChanged="listView_SelectionChanged" />

        </StackPanel>

    </ScrollViewer>
  </Grid>
</Page>

MainPage.xaml.cs にプラットフォーム毎に異なるテキストを設定するコードを追加します。
追加する場所はコンストラクタ ( public MainPage() { ... ) の最後です。

#if __WASM__
           platform.Text = "WASM";
#endif
#if WINDOWS_UWP
           platform.Text = "UWP";
#endif
#if __ANDROID__
           platform.Text = "Android";
#endif
#if __IOS__
           platform.Text = "iOS";
#endif

MainPage.xaml.cs 全体は次のようになります。

using Windows.UI.Xaml;
using Windows.UI.Xaml.Controls;
using UnoApp1.Shared;

namespace UnoApp1
{
    public sealed partial class MainPage : Page
    {
        public MainPage()
        {
            this.InitializeComponent();
            this.DataContext = new MainPageViewModel();
            this.panel2.DataContext = new MainPageViewModeBindingBase();
            listView.DataContext = new[] { "草加せんべい", "越谷かもねぎ鍋", "深谷ネギ", "十万石まんじゅう", "くらづくり最中" };
#if __WASM__
           platform.Text = "WASM";
#endif
#if WINDOWS_UWP
           platform.Text = "UWP";
#endif
#if __ANDROID__
           platform.Text = "Android";
#endif
#if __IOS__
           platform.Text = "iOS";
#endif
       }

        private void Button1_Click(object sender, RoutedEventArgs e)
        {
            textBlock1.Text = $"{textBox1.Text}{textBox2.Text}";
        }

        private void listView_SelectionChanged(object sender, SelectionChangedEventArgs e)
        {
            var view = sender as ListView;
            var index = view.SelectedIndex;
            if (index < 0) return;
            var value = (view.DataContext as string[])[index];

            this.Frame.Navigate(typeof(SecondPage), value);

            var data = listView.DataContext;
            listView.DataContext = null;
            listView.DataContext = data;
        }
    }
}

実行結果
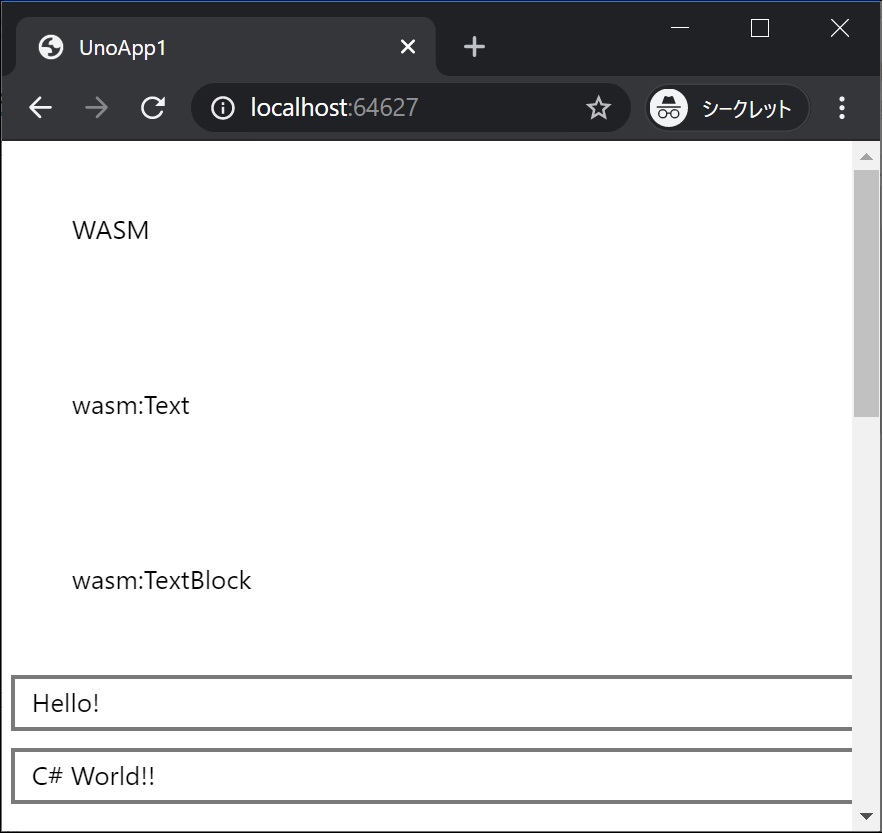
f:id:rksoftware:20200223154212j:plain

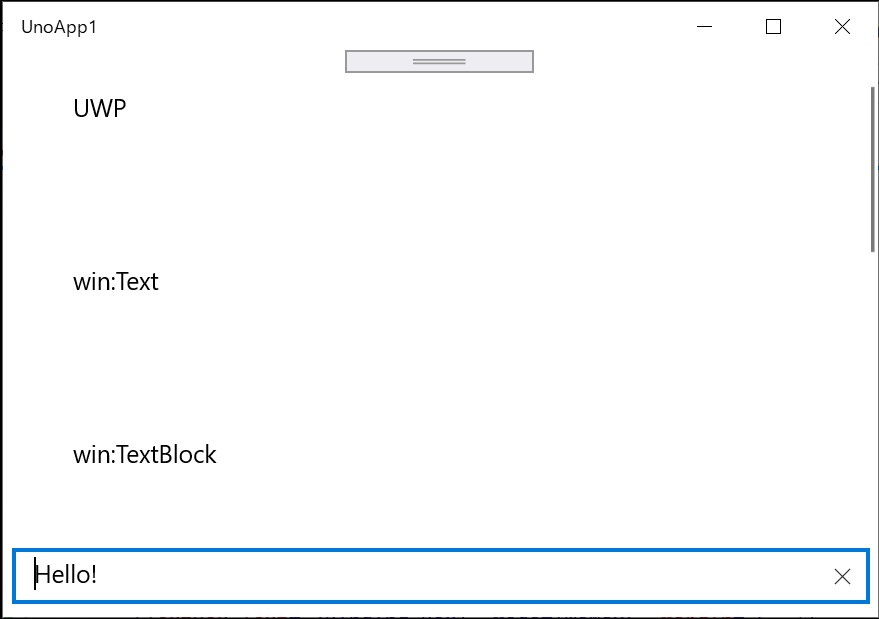
f:id:rksoftware:20200223154240j:plain

プラットフォーム名が表示されました。画像は掲載していませんが、Android、iOS でも同様です。

■ XAML のプロパティをプラットフォーム毎に変える

XAML の要素のプロパティをプラットフォーム毎に変えてみます。
MainPage.xaml の先頭付近の Page 要素に次の属性を追加します。

    xmlns:wasm="http://uno.ui/wasm"
    xmlns:win="http://schemas.microsoft.com/winfx/2006/xaml/presentation"
    xmlns:android="http://uno.ui/android"
    xmlns:ios="http://uno.ui/ios"

続いて、Page 要素の mc:Ignorable の値に wasm android ios を追加します。

    mc:Ignorable="d wasm android ios"

さらに、プラットフォーム毎に異なる Text プロパティ値を設定する TextBlock を追加します。

        <TextBlock Margin="40" 
                   wasm:Text="wasm:Text"
                   win:Text="win:Text"
                   android:Text="android:Text"
                   ios:Text="ios:Text"
          />

追加する場所は

  <Grid Background="{ThemeResource ApplicationPageBackgroundThemeBrush}">
    <ScrollViewer>
      <StackPanel>
        <TextBlock x:Name="platform" Margin="40" />

の下です。
MainPage.xaml 全体は次のようになります。

<Page
    x:Class="UnoApp1.MainPage"
    xmlns="http://schemas.microsoft.com/winfx/2006/xaml/presentation"
    xmlns:x="http://schemas.microsoft.com/winfx/2006/xaml"
    xmlns:local="using:UnoApp1"
    xmlns:d="http://schemas.microsoft.com/expression/blend/2008"
    xmlns:mc="http://schemas.openxmlformats.org/markup-compatibility/2006"
    mc:Ignorable="d">

  <Grid Background="{ThemeResource ApplicationPageBackgroundThemeBrush}">
    <ScrollViewer>
      <StackPanel>
        <TextBlock x:Name="platform" Margin="40" />
        <TextBlock Margin="40" 
                   wasm:Text="wasm:Text"
                   win:Text="win:Text"
                   android:Text="android:Text"
                   ios:Text="ios:Text"
          />
        
        <TextBox x:Name="textBox1" Text="Hello! " Margin="5" />
        <TextBox x:Name="textBox2" Text="C# World!!" Margin="5" />
        <TextBlock x:Name="textBlock1" Margin="20" FontSize="30" />
        <Button Content="最初のボタン" Click="Button1_Click"/>

        <TextBox Text="{Binding Box1, Mode=TwoWay}" Margin="5" />
        <TextBox Text="{Binding Box2, Mode=TwoWay}" Margin="5" />
        <TextBlock Text="{Binding Block1, Mode=TwoWay}" Margin="20" FontSize="30" />
        <Button Command="{Binding Click}" Content="DataBinding のボタン"/>

        <StackPanel x:Name="panel2">
          <TextBox Text="{Binding Box21, Mode=TwoWay, UpdateSourceTrigger=PropertyChanged}" Margin="5" />
          <TextBox Text="{Binding Box22, Mode=TwoWay, UpdateSourceTrigger=PropertyChanged}" Margin="5" />
          <TextBlock Text="{Binding Block21}" Margin="20" FontSize="30" />
        </StackPanel>

        <ListView x:Name="listView" Height="150" Background="LightGray"
                  ItemsSource="{Binding}" SelectionChanged="listView_SelectionChanged" />

        </StackPanel>

    </ScrollViewer>
  </Grid>
</Page>

ここでは実行結果はまだ確認せず次の手順も行ってまとめて確認します。

■ XAML の要素をプラットフォーム毎に変える

プロパティだけでなく、XAML の要素のレベルでプラットフォーム毎に変えてみます。
MainPage.xaml の先頭付近の Page 要素に次の属性を追加します。

        <wasm:TextBlock Text="wasm:TextBlock" Margin="40"/>
        <win:TextBlock Text="win:TextBlock" Margin="40"/>
        <android:TextBlock Text="android:TextBlock" Margin="40" />
        <ios:TextBlock Text="ios:TextBlock" Margin="40" />

追加する場所は、先の手順で追加した TextBlock のすぐ下です。
MainPage.xaml 全体は次のようになります。

<Page
    x:Class="UnoApp1.MainPage"
    xmlns="http://schemas.microsoft.com/winfx/2006/xaml/presentation"
    xmlns:x="http://schemas.microsoft.com/winfx/2006/xaml"
    xmlns:local="using:UnoApp1"
    xmlns:d="http://schemas.microsoft.com/expression/blend/2008"
    xmlns:mc="http://schemas.openxmlformats.org/markup-compatibility/2006"
    xmlns:wasm="http://uno.ui/wasm"
    xmlns:win="http://schemas.microsoft.com/winfx/2006/xaml/presentation"
    xmlns:android="http://uno.ui/android"
    xmlns:ios="http://uno.ui/ios"
    mc:Ignorable="d wasm android ios">

  <Grid Background="{ThemeResource ApplicationPageBackgroundThemeBrush}">
    <ScrollViewer>
      <StackPanel>
        <TextBlock x:Name="platform" Margin="40" />
        <TextBlock Margin="40" 
                   wasm:Text="wasm:Text"
                   win:Text="win:Text"
                   android:Text="android:Text"
                   ios:Text="ios:Text"
          />
        <wasm:TextBlock Text="wasm:TextBlock" Margin="40"/>
        <win:TextBlock Text="win:TextBlock" Margin="40"/>
        <android:TextBlock Text="android:TextBlock" Margin="40" />
        <ios:TextBlock Text="ios:TextBlock" Margin="40" />
        
        <TextBox x:Name="textBox1" Text="Hello! " Margin="5" />
        <TextBox x:Name="textBox2" Text="C# World!!" Margin="5" />
        <TextBlock x:Name="textBlock1" Margin="20" FontSize="30" />
        <Button Content="最初のボタン" Click="Button1_Click"/>

        <TextBox Text="{Binding Box1, Mode=TwoWay}" Margin="5" />
        <TextBox Text="{Binding Box2, Mode=TwoWay}" Margin="5" />
        <TextBlock Text="{Binding Block1, Mode=TwoWay}" Margin="20" FontSize="30" />
        <Button Command="{Binding Click}" Content="DataBinding のボタン"/>

        <StackPanel x:Name="panel2">
          <TextBox Text="{Binding Box21, Mode=TwoWay, UpdateSourceTrigger=PropertyChanged}" Margin="5" />
          <TextBox Text="{Binding Box22, Mode=TwoWay, UpdateSourceTrigger=PropertyChanged}" Margin="5" />
          <TextBlock Text="{Binding Block21}" Margin="20" FontSize="30" />
        </StackPanel>

        <ListView x:Name="listView" Height="150" Background="LightGray"
                  ItemsSource="{Binding}" SelectionChanged="listView_SelectionChanged" />

        </StackPanel>

    </ScrollViewer>
  </Grid>
</Page>

実行結果
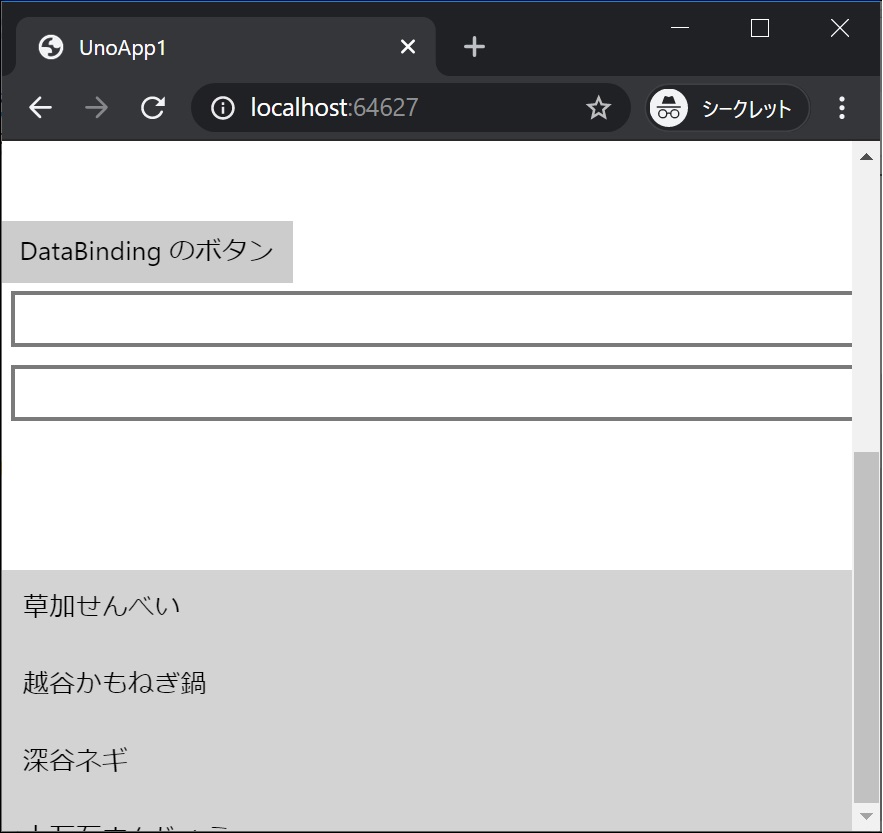
f:id:rksoftware:20200223154307j:plain

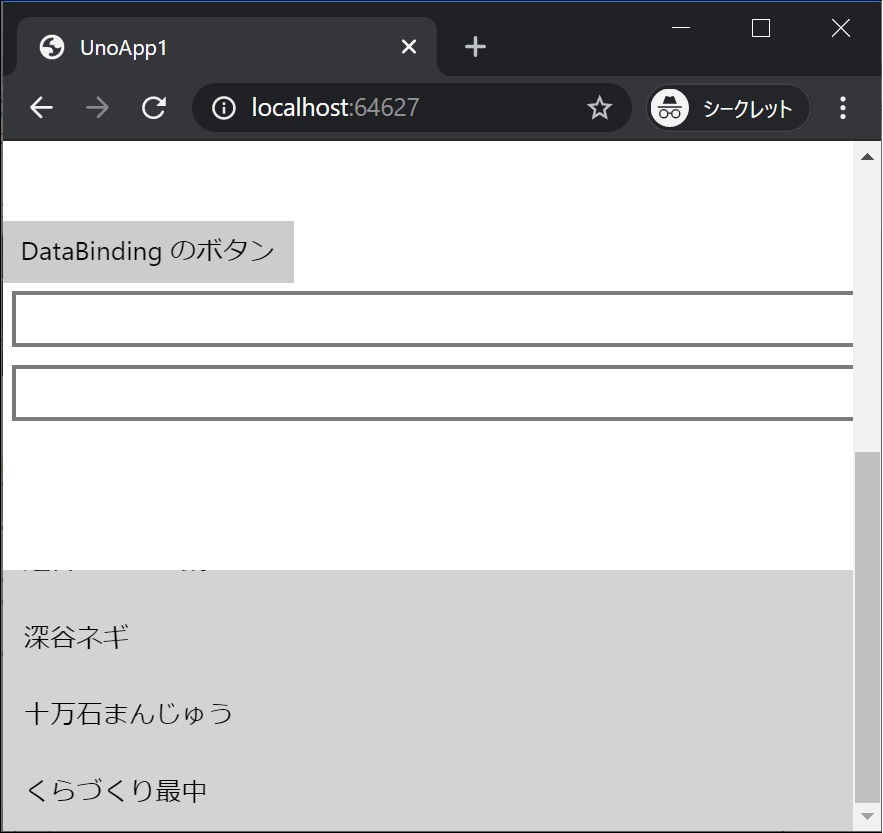
f:id:rksoftware:20200223154344j:plain

計画通り。
プラットフォーム毎に異なる表示がされました。画像は掲載していませんが、Android、iOS でも同様です。

■ 一連の記事はこれで終わりです

今回の一連の Hello world はこれで終わりです。

Uno Platform で はろーわーるど その5

Uno Platform の はろーわーるど 一連の記事の目次です

■ 今回の記事

Uno Platform のプロジェクトを作成し DataBinding で動きをつける記事を以前に書きました。

今回はデータのリスト表示と画面遷移をしてみます。

なお、コピペ量を減らすためにここから先はまた not DataBinding で書いていきます(もう少し広い知識が必要になり、一旦動かしてみるまでの遠回りになってしまうため)。皆さんが実プロダクトでコードを書くときは、Data を Binding するなどしてください。

■ リスト表示を追加

MainPage.xaml に ListView を画面に追加します。

        <ListView x:Name="listView" Height="150" Background="LightGray"
                  ItemsSource="{Binding}"/>

MainPage.xaml 全体は次のようになります。

<Page
    x:Class="UnoApp1.MainPage"
    xmlns="http://schemas.microsoft.com/winfx/2006/xaml/presentation"
    xmlns:x="http://schemas.microsoft.com/winfx/2006/xaml"
    xmlns:local="using:UnoApp1"
    xmlns:d="http://schemas.microsoft.com/expression/blend/2008"
    xmlns:mc="http://schemas.openxmlformats.org/markup-compatibility/2006"
    mc:Ignorable="d">

  <Grid Background="{ThemeResource ApplicationPageBackgroundThemeBrush}">
    <ScrollViewer>
      <StackPanel>
        <TextBox x:Name="textBox1" Text="Hello! " Margin="5" />
        <TextBox x:Name="textBox2" Text="C# World!!" Margin="5" />
        <TextBlock x:Name="textBlock1" Margin="20" FontSize="30" />
        <Button Content="最初のボタン" Click="Button1_Click"/>

        <TextBox Text="{Binding Box1, Mode=TwoWay}" Margin="5" />
        <TextBox Text="{Binding Box2, Mode=TwoWay}" Margin="5" />
        <TextBlock Text="{Binding Block1, Mode=TwoWay}" Margin="20" FontSize="30" />
        <Button Command="{Binding Click}" Content="DataBinding のボタン"/>

        <StackPanel x:Name="panel2">
          <TextBox Text="{Binding Box21, Mode=TwoWay, UpdateSourceTrigger=PropertyChanged}" Margin="5" />
          <TextBox Text="{Binding Box22, Mode=TwoWay, UpdateSourceTrigger=PropertyChanged}" Margin="5" />
          <TextBlock Text="{Binding Block21}" Margin="20" FontSize="30" />
        </StackPanel>

        <ListView x:Name="listView" Height="150" Background="LightGray"
                  ItemsSource="{Binding}"/>

        </StackPanel>

    </ScrollViewer>
  </Grid>
</Page>

MainPage.xaml.cs リストにデータを表示するコードを追加します。
追加する場所はコンストラクタ ( public MainPage() { ... ) の最後です。

            listView.DataContext = new[] { "草加せんべい", "越谷かもねぎ鍋", "深谷ネギ", "十万石まんじゅう", "くらづくり最中" };

MainPage.xaml.cs 全体は次のようになります。

using Windows.UI.Xaml;
using Windows.UI.Xaml.Controls;
using UnoApp1.Shared;

namespace UnoApp1
{
    public sealed partial class MainPage : Page
    {
        public MainPage()
        {
            this.InitializeComponent();
            this.DataContext = new MainPageViewModel();
            this.panel2.DataContext = new MainPageViewModeBindingBase();
            listView.DataContext = new[] { "草加せんべい", "越谷かもねぎ鍋", "深谷ネギ", "十万石まんじゅう", "くらづくり最中" };
       }

        private void Button1_Click(object sender, RoutedEventArgs e)
        {
            textBlock1.Text = $"{textBox1.Text}{textBox2.Text}";
        }
    }
}

実行結果
f:id:rksoftware:20200223142708j:plain

f:id:rksoftware:20200223142824j:plain

埼玉の名産が一覧表示され、スクロールもできます!

■ 一覧選択時に画面遷移する

SecondPage 画面の追加

<プロジェクト名>.Shared プロジェクトに遷移先画面を追加します。
ソリューションエクスプローラ > プロジェクト名 > 右クリック > 追加 > 新しい項目 > 空白のページ で [ 名前 ] に 「 SecondPage.xaml 」と入力、[ 追加 ] ボタンをクリックします。

SecondPage.xaml に一覧で選択された値の表示と、[ 戻る ] ボタンを追加します。

      <StackPanel>
        <TextBlock Text="あなたの選択は"/>
        <TextBlock x:Name="textBlock"/>
        <TextBlock Text="ですね"/>
        <Button Content="GoNext" Click="Button_Click_GoBack"/>
      </StackPanel>

SecondPage.xaml 全体は次のようになります。

<Page
    x:Class="UnoApp1.Shared.SecondPage"
    xmlns="http://schemas.microsoft.com/winfx/2006/xaml/presentation"
    xmlns:x="http://schemas.microsoft.com/winfx/2006/xaml"
    xmlns:local="using:UnoApp1.Shared"
    xmlns:d="http://schemas.microsoft.com/expression/blend/2008"
    xmlns:mc="http://schemas.openxmlformats.org/markup-compatibility/2006"
    mc:Ignorable="d"
    Background="{ThemeResource ApplicationPageBackgroundThemeBrush}">

    <Grid>
      <StackPanel>
        <TextBlock Text="あなたの選択は"/>
        <TextBlock x:Name="textBlock"/>
        <TextBlock Text="ですね"/>
        <Button Content="GoNext" Click="Button_Click_GoBack"/>
      </StackPanel>
    </Grid>
</Page>

SecondPage.xaml.cs に前画面で選択された値の表示と、戻る 動作を追加します。

        private void Button_Click_GoBack(object sender, RoutedEventArgs e)
        {
            this.Frame.GoBack();
        }

        protected override void OnNavigatedTo(NavigationEventArgs e)
        {
            textBlock.Text = e.Parameter as string;

            base.OnNavigatedTo(e);
        }

SecondPage.xaml.cs 全体は次のようになります。

using Windows.UI.Xaml;
using Windows.UI.Xaml.Controls;
using Windows.UI.Xaml.Navigation;

namespace UnoApp1.Shared
{
    public sealed partial class SecondPage : Page
    {
        public SecondPage()
        {
            this.InitializeComponent();
        }

        private void Button_Click_GoBack(object sender, RoutedEventArgs e)
        {
            this.Frame.GoBack();
        }

        protected override void OnNavigatedTo(NavigationEventArgs e)
        {
            textBlock.Text = e.Parameter as string;

            base.OnNavigatedTo(e);
        }
    }
}

最初の画面に一覧選択時の画面遷移を追加

MainPage.xaml に ListView で要素選択時の処理を行えるイベントハンドラの設定を追加します。

SelectionChanged="listView_SelectionChanged"

イベントハンドラの設定を追加した ListView は次の様になります。

        <ListView x:Name="listView" Height="150" Background="LightGray"
                  ItemsSource="{Binding}" SelectionChanged="listView_SelectionChanged" />

MainPage.xaml 全体は次のようになります。

<Page
    x:Class="UnoApp1.MainPage"
    xmlns="http://schemas.microsoft.com/winfx/2006/xaml/presentation"
    xmlns:x="http://schemas.microsoft.com/winfx/2006/xaml"
    xmlns:local="using:UnoApp1"
    xmlns:d="http://schemas.microsoft.com/expression/blend/2008"
    xmlns:mc="http://schemas.openxmlformats.org/markup-compatibility/2006"
    mc:Ignorable="d">

  <Grid Background="{ThemeResource ApplicationPageBackgroundThemeBrush}">
    <ScrollViewer>
      <StackPanel>
        <TextBox x:Name="textBox1" Text="Hello! " Margin="5" />
        <TextBox x:Name="textBox2" Text="C# World!!" Margin="5" />
        <TextBlock x:Name="textBlock1" Margin="20" FontSize="30" />
        <Button Content="最初のボタン" Click="Button1_Click"/>

        <TextBox Text="{Binding Box1, Mode=TwoWay}" Margin="5" />
        <TextBox Text="{Binding Box2, Mode=TwoWay}" Margin="5" />
        <TextBlock Text="{Binding Block1, Mode=TwoWay}" Margin="20" FontSize="30" />
        <Button Command="{Binding Click}" Content="DataBinding のボタン"/>

        <StackPanel x:Name="panel2">
          <TextBox Text="{Binding Box21, Mode=TwoWay, UpdateSourceTrigger=PropertyChanged}" Margin="5" />
          <TextBox Text="{Binding Box22, Mode=TwoWay, UpdateSourceTrigger=PropertyChanged}" Margin="5" />
          <TextBlock Text="{Binding Block21}" Margin="20" FontSize="30" />
        </StackPanel>

        <ListView x:Name="listView" Height="150" Background="LightGray"
                  ItemsSource="{Binding}" SelectionChanged="listView_SelectionChanged" />

        </StackPanel>

    </ScrollViewer>
  </Grid>
</Page>

MainPage.xaml.cs に一覧で要素が選択された際に画面遷移するコードを追加します。
※ ここで書いたリストから選択値を取得するコードはあまり良いコードではありません。あまり良くないコードを書いた理由は、このコードがどのプラットフォームでも動作したからです。クロスプラットフォーム開発では、プラットフォーム毎に異なるコードを動かすべき場所が出てきます。プラットフォーム毎にコードを変える方法は次回で書きます。

        private void listView_SelectionChanged(object sender, SelectionChangedEventArgs e)
        {
            var view = sender as ListView;
            var index = view.SelectedIndex;
            if (index < 0) return;
            var value = (view.DataContext as string[])[index];

            this.Frame.Navigate(typeof(SecondPage), value);

            var data = listView.DataContext;
            listView.DataContext = null;
            listView.DataContext = data;
        }

画面遷移をしているコードは this.Frame.Navigate(typeof(SecondPage), value); の部分です。

MainPage.xaml.cs 全体は次のようになります。

using Windows.UI.Xaml;
using Windows.UI.Xaml.Controls;
using UnoApp1.Shared;

namespace UnoApp1
{
    public sealed partial class MainPage : Page
    {
        public MainPage()
        {
            this.InitializeComponent();
            this.DataContext = new MainPageViewModel();
            this.panel2.DataContext = new MainPageViewModeBindingBase();
            listView.DataContext = new[] { "草加せんべい", "越谷かもねぎ鍋", "深谷ネギ", "十万石まんじゅう", "くらづくり最中" };
       }

        private void Button1_Click(object sender, RoutedEventArgs e)
        {
            textBlock1.Text = $"{textBox1.Text}{textBox2.Text}";
        }

        private void listView_SelectionChanged(object sender, SelectionChangedEventArgs e)
        {
            var view = sender as ListView;
            var index = view.SelectedIndex;
            if (index < 0) return;
            var value = (view.DataContext as string[])[index];

            this.Frame.Navigate(typeof(SecondPage), value);

            var data = listView.DataContext;
            listView.DataContext = null;
            listView.DataContext = data;
        }
    }
}

実行結果
f:id:rksoftware:20200223142931j:plain

f:id:rksoftware:20200223143112j:plain

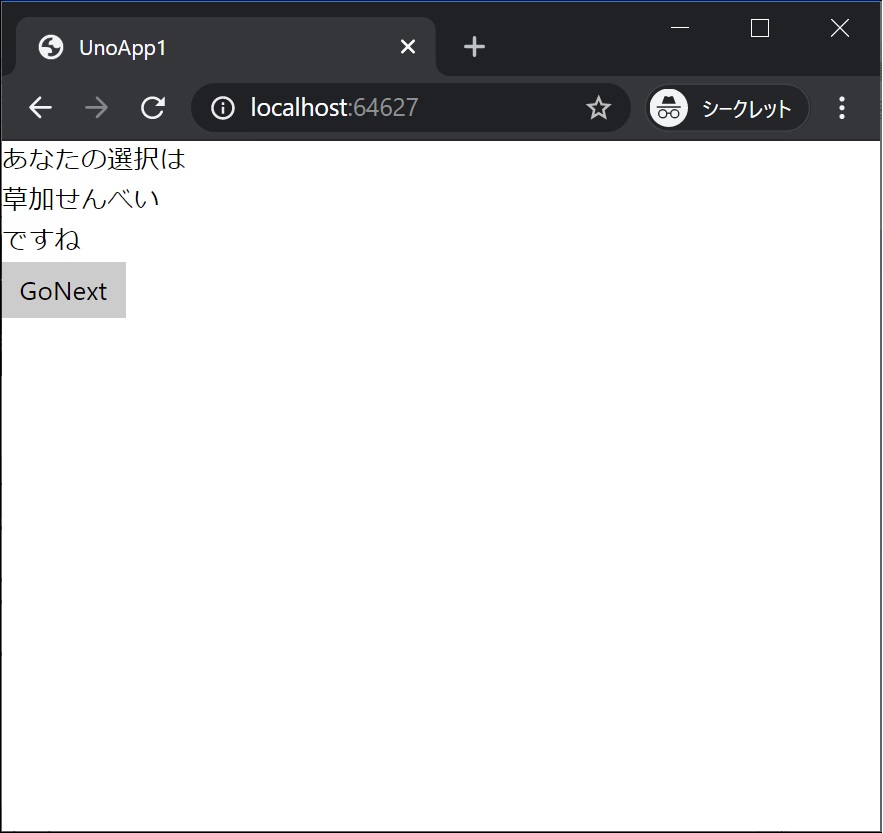
私は 草加せんべい を選択!
一覧で要素を選択すると、画面遷移し遷移先の画面に選択した値が表示されました!

■ 次回

次回は、プラットフォーム毎にコードなどを変えてみます。

Uno Platform で はろーわーるど その4

Uno Platform の はろーわーるど 一連の記事の目次です

■ 今回の記事

Uno Platform のプロジェクトを作成しひとまず動きをつける記事を以前に書きました。

今回は皆さん大好き、DataBinding をしてみます。

■ Data を Binding する画面要素を追加

前回に動きを付けた時と同じセットを、DataBinding 用に画面に追加します。

        <TextBox Text="{Binding Box1, Mode=TwoWay}" Margin="5" />
        <TextBox Text="{Binding Box2, Mode=TwoWay}" Margin="5" />
        <TextBlock Text="{Binding Block1, Mode=TwoWay}" Margin="20" FontSize="30" />
        <Button Command="{Binding Click}" Content="DataBinding のボタン"/>

MainPage.xaml 全体は次のようになります。

<Page
    x:Class="UnoApp1.MainPage"
    xmlns="http://schemas.microsoft.com/winfx/2006/xaml/presentation"
    xmlns:x="http://schemas.microsoft.com/winfx/2006/xaml"
    xmlns:local="using:UnoApp1"
    xmlns:d="http://schemas.microsoft.com/expression/blend/2008"
    xmlns:mc="http://schemas.openxmlformats.org/markup-compatibility/2006"
    mc:Ignorable="d">

  <Grid Background="{ThemeResource ApplicationPageBackgroundThemeBrush}">
    <ScrollViewer>
      <StackPanel>
        <TextBox x:Name="textBox1" Text="Hello! " Margin="5" />
        <TextBox x:Name="textBox2" Text="C# World!!" Margin="5" />
        <TextBlock x:Name="textBlock1" Margin="20" FontSize="30" />
        <Button Content="最初のボタン" Click="Button1_Click"/>

        <TextBox Text="{Binding Box1, Mode=TwoWay}" Margin="5" />
        <TextBox Text="{Binding Box2, Mode=TwoWay}" Margin="5" />
        <TextBlock Text="{Binding Block1, Mode=TwoWay}" Margin="20" FontSize="30" />
        <Button Command="{Binding Click}" Content="DataBinding のボタン"/>

      </StackPanel>

    </ScrollViewer>
  </Grid>
</Page>

■ Command クラス、ViewModel クラスを追加

<プロジェクト名>.Share プロジェクトに Command クラス、ViewModel クラスを追加します。

Command クラス

using System;
using System.Windows.Input;

namespace UnoApp1.Shared
{
    class Command : ICommand
    {
        public event EventHandler CanExecuteChanged;
        public Action<object> Action { get; set; }

        public bool CanExecute(object parameter) => true;

        public void Execute(object parameter) => Action?.Invoke(parameter);
    }
}

ViewModel クラス

using System.ComponentModel;

namespace UnoApp1.Shared
{
    class MainPageViewModel : INotifyPropertyChanged
    {
        public event PropertyChangedEventHandler PropertyChanged;

        public string Box1 { get; set; }
        public string Box2 { get; set; }

        public string Block1 { get; set; }

        public Command Click { get; } = new Command();

        public MainPageViewModel() => Click.Action = OnClicked;

        void OnClicked(object parameter)
        {
            Block1 = $"{Box1}{Box2}";
            PropertyChanged?.Invoke(this, new PropertyChangedEventArgs(nameof(Block1)));
        }
    }
}

MainPage.xaml.cs の更新

次のコードを追加します。

            this.DataContext = new MainPageViewModel();

MainPage.xaml.cs 全体は次のようになります。

using Windows.UI.Xaml;
using Windows.UI.Xaml.Controls;
using UnoApp1.Shared;

namespace UnoApp1
{
    public sealed partial class MainPage : Page
    {
        public MainPage()
        {
            this.InitializeComponent();
            this.DataContext = new MainPageViewModel();
       }

        private void Button1_Click(object sender, RoutedEventArgs e)
        {
            textBlock1.Text = $"{textBox1.Text}{textBox2.Text}";
        }
    }
}

実行結果
f:id:rksoftware:20200221215156j:plain

f:id:rksoftware:20200221215219j:plain

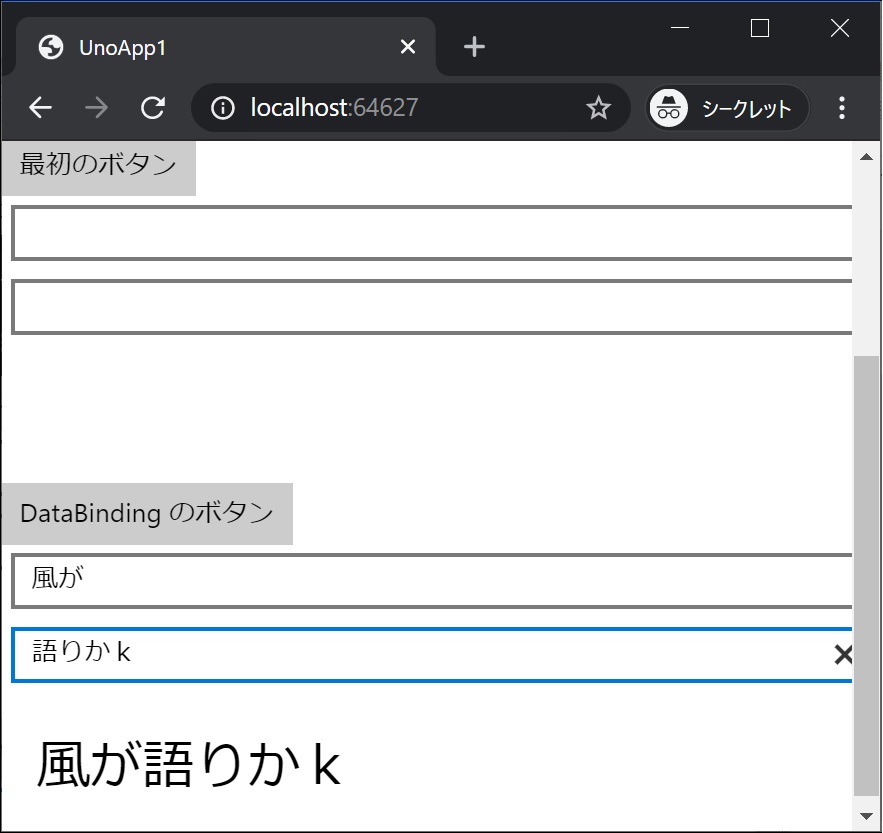
見事! DataBinding が動作しました!

■ BindingBase クラスと UpdateSourceTrigger=PropertyChanged

ここまでシンプルな DataBinding をしてきましたが、皆さん実際には良く BindingBase クラスを作ったり、値の更新タイミングを UpdateSourceTrigger=PropertyChanged にしていたりしていると思います。
BindingBase クラスと UpdateSourceTrigger=PropertyChanged でやってみます。

■ Data を Binding する画面要素を追加

前回に動きを付けた時と同じセットを画面に追加します。

        <StackPanel x:Name="panel2">
          <TextBox Text="{Binding Box21, Mode=TwoWay, UpdateSourceTrigger=PropertyChanged}" Margin="5" />
          <TextBox Text="{Binding Box22, Mode=TwoWay, UpdateSourceTrigger=PropertyChanged}" Margin="5" />
          <TextBlock Text="{Binding Block21}" Margin="20" FontSize="30" />
        </StackPanel>

MainPage.xaml 全体は次のようになります。

<Page
    x:Class="UnoApp1.MainPage"
    xmlns="http://schemas.microsoft.com/winfx/2006/xaml/presentation"
    xmlns:x="http://schemas.microsoft.com/winfx/2006/xaml"
    xmlns:local="using:UnoApp1"
    xmlns:d="http://schemas.microsoft.com/expression/blend/2008"
    xmlns:mc="http://schemas.openxmlformats.org/markup-compatibility/2006"
    mc:Ignorable="d">

  <Grid Background="{ThemeResource ApplicationPageBackgroundThemeBrush}">
    <ScrollViewer>
      <StackPanel>
        <TextBox x:Name="textBox1" Text="Hello! " Margin="5" />
        <TextBox x:Name="textBox2" Text="C# World!!" Margin="5" />
        <TextBlock x:Name="textBlock1" Margin="20" FontSize="30" />
        <Button Content="最初のボタン" Click="Button1_Click"/>

        <TextBox Text="{Binding Box1, Mode=TwoWay}" Margin="5" />
        <TextBox Text="{Binding Box2, Mode=TwoWay}" Margin="5" />
        <TextBlock Text="{Binding Block1, Mode=TwoWay}" Margin="20" FontSize="30" />
        <Button Command="{Binding Click}" Content="DataBinding のボタン"/>

        <StackPanel x:Name="panel2">
          <TextBox Text="{Binding Box21, Mode=TwoWay, UpdateSourceTrigger=PropertyChanged}" Margin="5" />
          <TextBox Text="{Binding Box22, Mode=TwoWay, UpdateSourceTrigger=PropertyChanged}" Margin="5" />
          <TextBlock Text="{Binding Block21}" Margin="20" FontSize="30" />
        </StackPanel>

      </StackPanel>

    </ScrollViewer>
  </Grid>
</Page>

■ BindingBase クラス、ViewModel クラスを追加

BindingBase クラス、ViewModel クラスを追加します。

BindingBase クラス

using System;
using System.ComponentModel;
using System.Runtime.CompilerServices;

namespace UnoApp1.Shared
{
    class BindingBase : INotifyPropertyChanged
    {
        public event PropertyChangedEventHandler PropertyChanged;

        protected bool SetProperty<T>(ref T property, T value, [CallerMemberName] string propertyName = null)
        {
            if (Object.Equals(property, value)) return false;
            property = value;
            PropertyChanged?.Invoke(this, new PropertyChangedEventArgs(propertyName));
            return true;
        }
    }
}

ViewModel クラス

namespace UnoApp1.Shared
{
    class MainPageViewModeBindingBase : BindingBase
    {
        string _box21;
        public string Box21 { get => _box21; set { if (SetProperty(ref _box21, value)) OnChanged(); } }
        string _box22;
        public string Box22 { get => _box22; set { if (SetProperty(ref _box22, value)) OnChanged(); } }

        string _block21;
        public string Block21 { get => _block21; set => SetProperty(ref _block21, value); }

        void OnChanged() => Block21 = $"{Box21}{Box22}";
    }
}

MainPage.xaml.cs の更新

次のコードを追加します。

            this.panel2.DataContext = new MainPageViewModeBindingBase();

MainPage.xaml.cs 全体は次のようになります。

using Windows.UI.Xaml;
using Windows.UI.Xaml.Controls;
using UnoApp1.Shared;

namespace UnoApp1
{
    public sealed partial class MainPage : Page
    {
        public MainPage()
        {
            this.InitializeComponent();
            this.DataContext = new MainPageViewModel();
            this.panel2.DataContext = new MainPageViewModeBindingBase();
       }

        private void Button1_Click(object sender, RoutedEventArgs e)
        {
            textBlock1.Text = $"{textBox1.Text}{textBox2.Text}";
        }
    }
}

実行結果
f:id:rksoftware:20200221215258j:plain

f:id:rksoftware:20200221215322j:plain

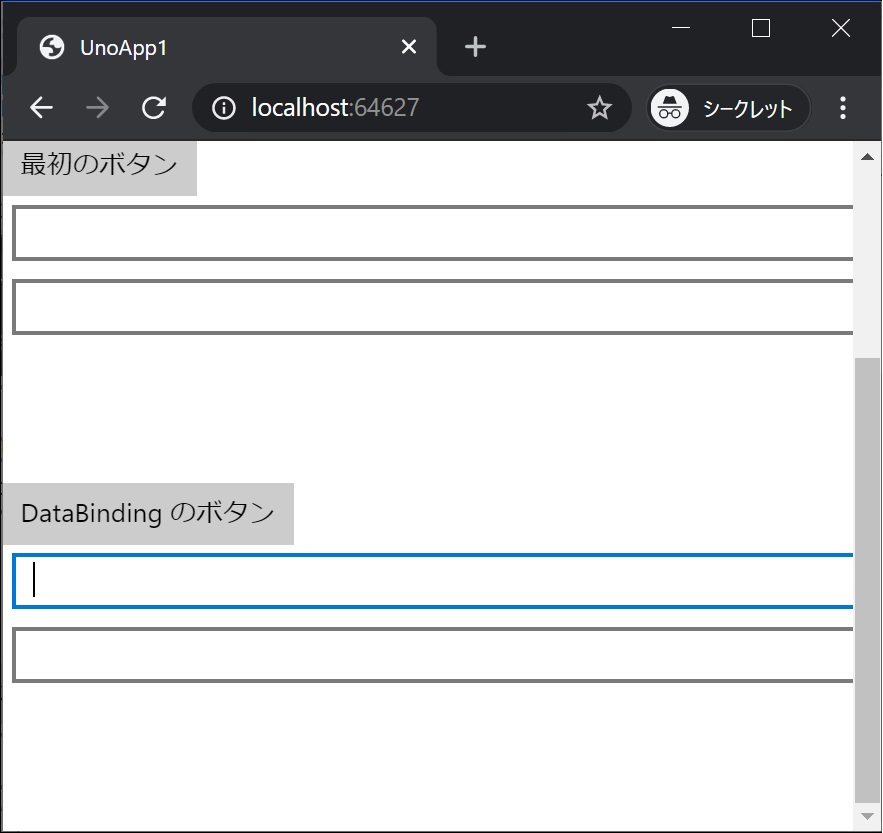
見事! Data が Binding しました!

■ 次回

次回は、データをリスト表示と画面遷移をしてみます。

Uno Platform で はろーわーるど その3

Uno Platform の はろーわーるど 一連の記事の目次です

■ 今回の記事

Uno Platform のプロジェクトを作成しひとまず実行する記事を以前に書きました。

コードを変更し、動きのあるアプリにして行きます。

■ ScrollViewer を画面全体に表示

まず、画面全体に表示する ScrollViewer と StackPanel を追加します。

MainPage.xaml を開いて編集します。

編集前

<Page
    x:Class="UnoApp1.MainPage"
    xmlns="http://schemas.microsoft.com/winfx/2006/xaml/presentation"
    xmlns:x="http://schemas.microsoft.com/winfx/2006/xaml"
    xmlns:local="using:UnoApp1"
    xmlns:d="http://schemas.microsoft.com/expression/blend/2008"
    xmlns:mc="http://schemas.openxmlformats.org/markup-compatibility/2006"
    mc:Ignorable="d">

    <Grid Background="{ThemeResource ApplicationPageBackgroundThemeBrush}">
        <TextBlock Text="Hello, world!" Margin="20" FontSize="30" />
    </Grid>
</Page>

編集後

<Page
    x:Class="UnoApp1.MainPage"
    xmlns="http://schemas.microsoft.com/winfx/2006/xaml/presentation"
    xmlns:x="http://schemas.microsoft.com/winfx/2006/xaml"
    xmlns:local="using:UnoApp1"
    xmlns:d="http://schemas.microsoft.com/expression/blend/2008"
    xmlns:mc="http://schemas.openxmlformats.org/markup-compatibility/2006"
    mc:Ignorable="d">

  <Grid Background="{ThemeResource ApplicationPageBackgroundThemeBrush}">
    <ScrollViewer>
      <StackPanel>
        <TextBlock Text="Hello, world!" Margin="20" FontSize="30" />
      </StackPanel>
    </ScrollViewer>
  </Grid>
</Page>

ScrollViewer は表示が画面からはみ出るとスクロールできるようになります。
StackPanel はその子供の要素を一列に並べます。 挙動を確認するために、TextBox をたくさん増やしてみます。

  <Grid Background="{ThemeResource ApplicationPageBackgroundThemeBrush}">
    <ScrollViewer>
      <StackPanel>
        <TextBlock Text="Hello, world!" Margin="20" FontSize="30" />
        <TextBlock Text="風" Margin="20" FontSize="30" />
        <TextBlock Text="が" Margin="20" FontSize="30" />
        <TextBlock Text="語" Margin="20" FontSize="30" />
        <TextBlock Text="り" Margin="20" FontSize="30" />
        <TextBlock Text="か" Margin="20" FontSize="30" />
        <TextBlock Text="け" Margin="20" FontSize="30" />
        <TextBlock Text="ま" Margin="20" FontSize="30" />
        <TextBlock Text="す" Margin="20" FontSize="30" />
      </StackPanel>
    </ScrollViewer>
  </Grid>

実行結果

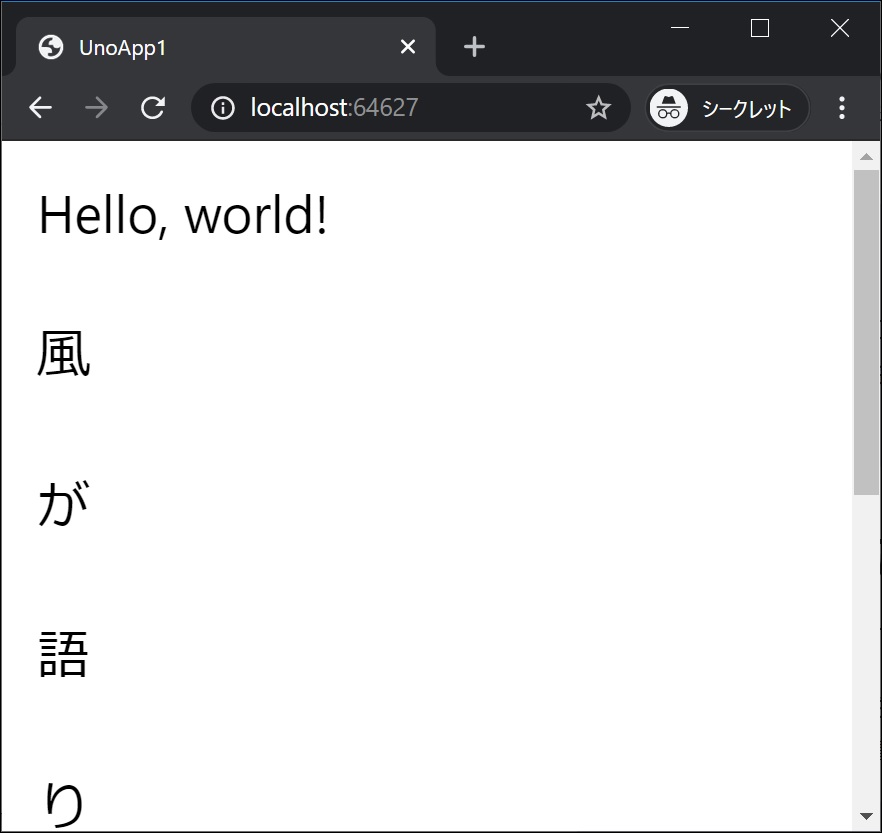
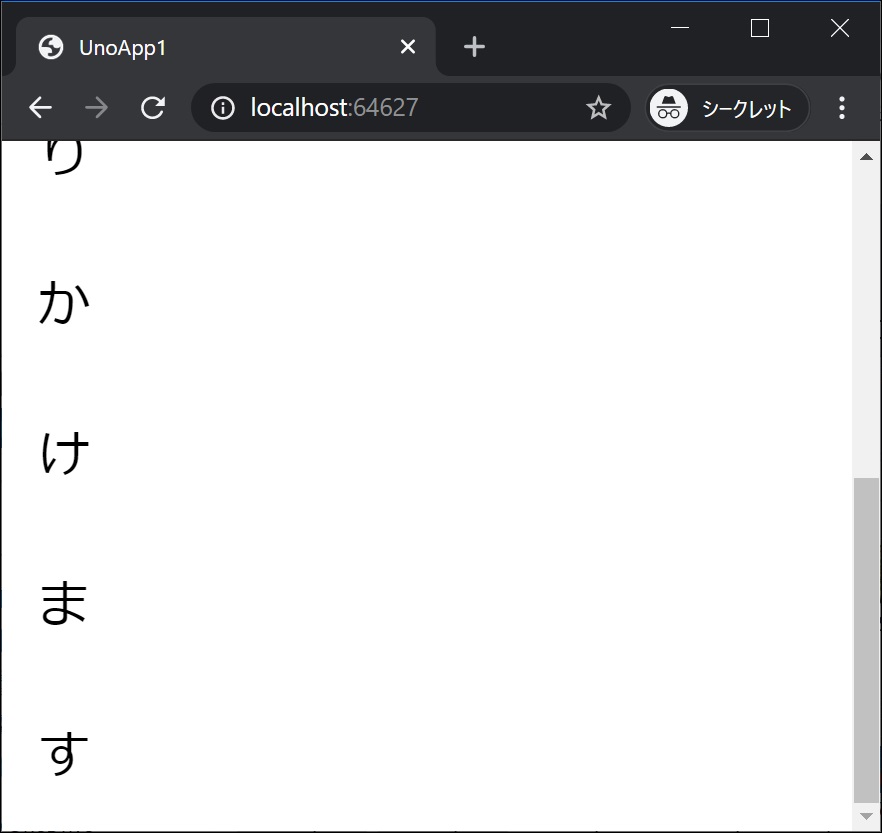
f:id:rksoftware:20200221205531j:plain

f:id:rksoftware:20200221205547j:plain

スクロールできるようになっています。

■ Button を置いてクリック時の処理を作る

ボタンクリック時の動きを作るコードの書き方は複数ありますが、まずはコード量の少ない方法から始めます。

今回は TextBox を 2 つと TextBlock 1 つ、 Button 1 つを画面に追加し、ボタンのクリックで TextBox の文字列をつなげて TextBlock に表示するようにします。
いったん、画面の TextBlock を全て削除し、4 つの要素を追加します。

      <StackPanel>
        <TextBox x:Name="textBox1" Text="Hello! " Margin="5" />
        <TextBox x:Name="textBox2" Text="C# World!!" Margin="5" />
        <TextBlock x:Name="textBlock1" Margin="20" FontSize="30" />
        <Button Content="最初のボタン" Click="Button1_Click"/>
      </StackPanel>

MainPage.xaml 全体は次のようになります。

<Page
    x:Class="UnoApp1.MainPage"
    xmlns="http://schemas.microsoft.com/winfx/2006/xaml/presentation"
    xmlns:x="http://schemas.microsoft.com/winfx/2006/xaml"
    xmlns:local="using:UnoApp1"
    xmlns:d="http://schemas.microsoft.com/expression/blend/2008"
    xmlns:mc="http://schemas.openxmlformats.org/markup-compatibility/2006"
    mc:Ignorable="d">

  <Grid Background="{ThemeResource ApplicationPageBackgroundThemeBrush}">
    <ScrollViewer>
      <StackPanel>
        <TextBox x:Name="textBox1" Text="Hello! " Margin="5" />
        <TextBox x:Name="textBox2" Text="C# World!!" Margin="5" />
        <TextBlock x:Name="textBlock1" Margin="20" FontSize="30" />
        <Button Content="最初のボタン" Click="Button1_Click"/>
      </StackPanel>
    </ScrollViewer>
  </Grid>
</Page>

MainPage.xaml.cs にもコードを追加します。

        private void Button1_Click(object sender, RoutedEventArgs e)
        {
            textBlock1.Text = $"{textBox1.Text}{textBox2.Text}";
        }

MainPage.xaml.cs 全体は次のようになります。

using Windows.UI.Xaml;
using Windows.UI.Xaml.Controls;

namespace UnoApp1
{
    public sealed partial class MainPage : Page
    {
        public MainPage()
        {
            this.InitializeComponent();
        }

        private void Button1_Click(object sender, RoutedEventArgs e)
        {
            textBlock1.Text = $"{textBox1.Text}{textBox2.Text}";
        }
    }
}

実行結果

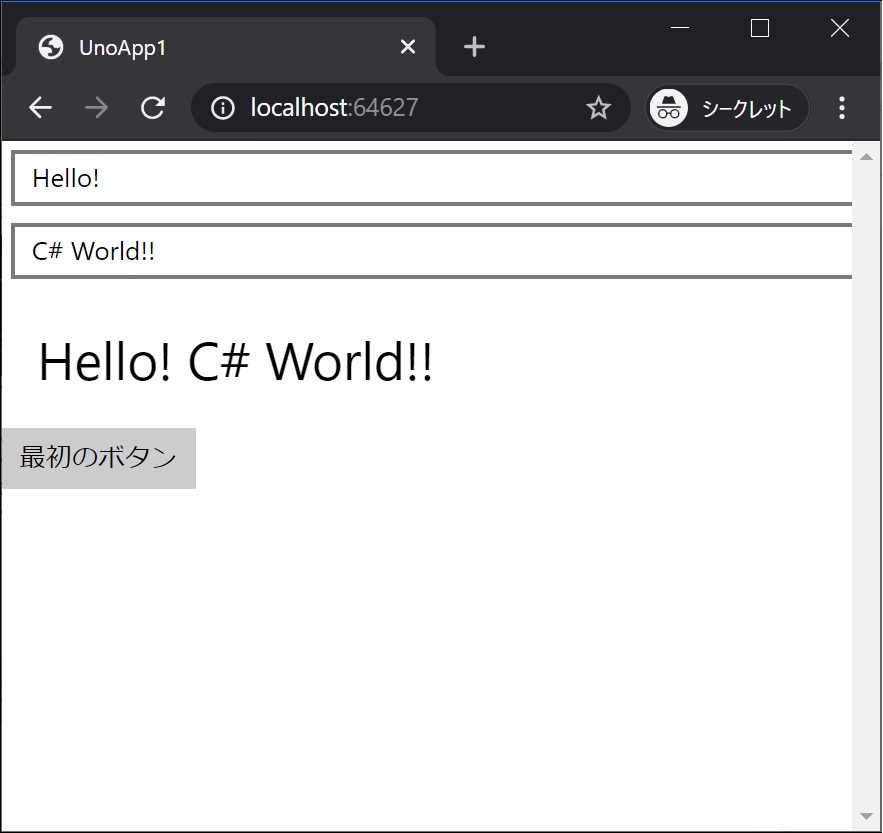
f:id:rksoftware:20200221205620j:plain

f:id:rksoftware:20200221205637j:plain

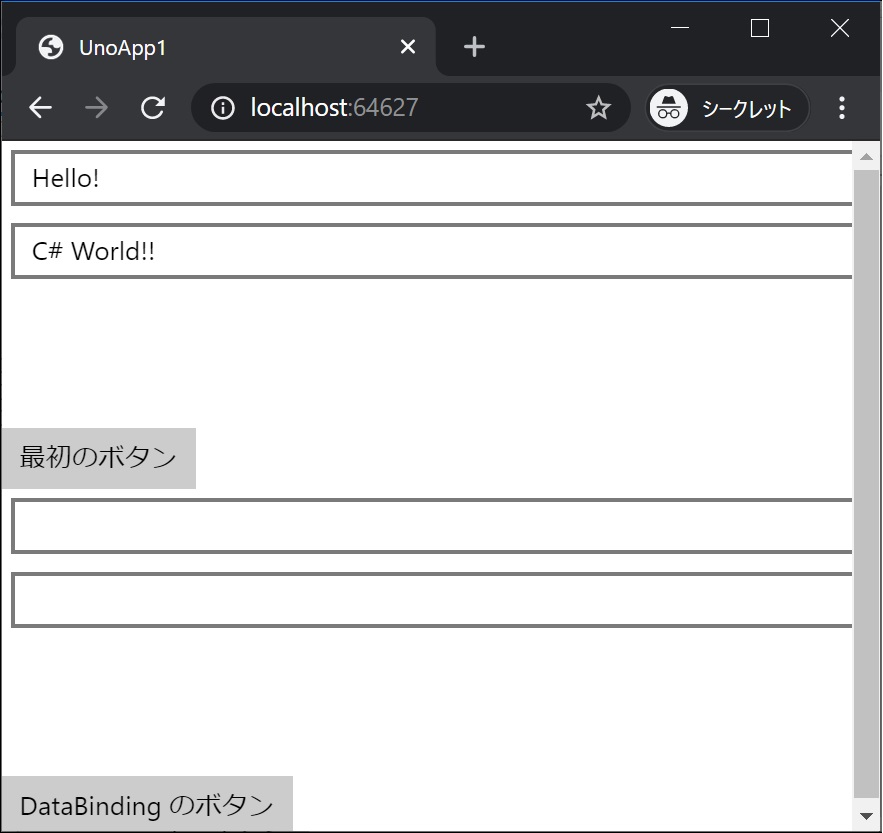
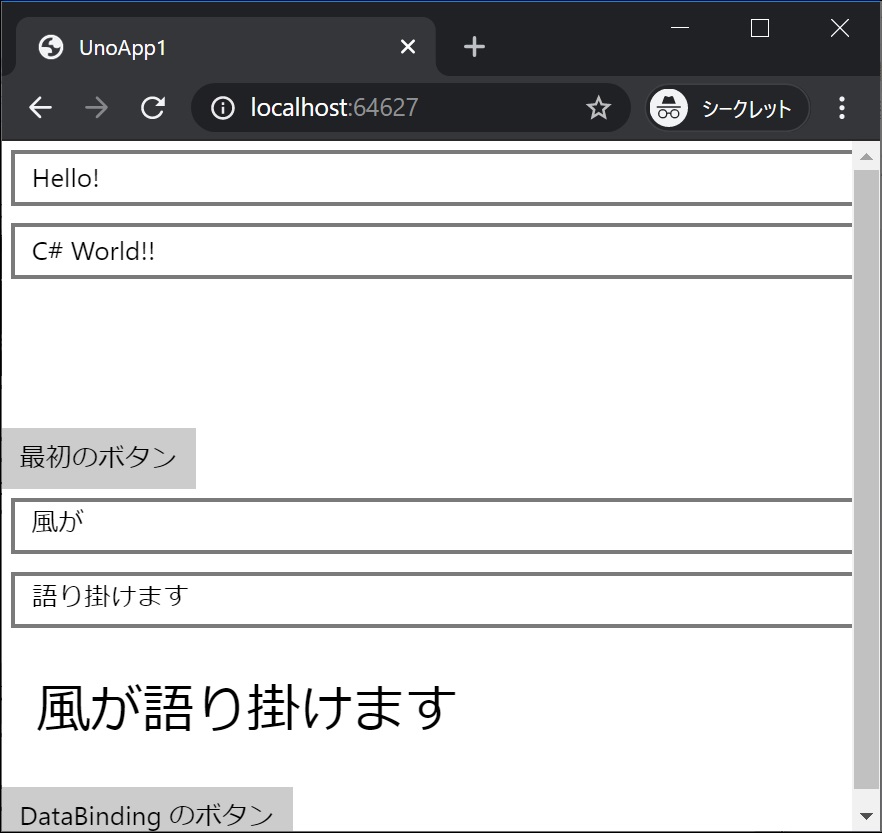
ボタンをクリックすると、TextBox の値をつなげた文字列が TextBlock に表示されます。

■ 次回

次回は皆さん大好き、DataBinding をしてみます。

秋葉原 C# もくもく会 #119 勉強会を開催しました

■ C# もくもく会

C# もくもく会 #119 を開催しました。

C# もくもく会 は東京の秋葉原で毎週木曜日に開催している .NET 系の勉強会です。
もくもく自習を基本とし、分からないことを教えあったり情報共有したりしている会です。 定期開催していますので、お時間のある時に遊びに来ていただければと思います。
ちょっと詰まった時、ネット上で聞くのははずかしいなぁ、という課題のできた時などにも思い出していただけると嬉しいです。
f:id:rksoftware:20200220200749j:plain

■ 今週の成果発表

今週は、もくもくの日でした。

それそれ新しい事にチャレンジしまくって成果発表どころではない盛り上がりでした。

ちなみにこの勉強会ですが、実は公序良俗に反しなければどのような技術を扱っても大丈夫です。そもそも C# エンジニアが C# だけしか使わないというわけではありませんし。

■初心者歓迎

このもくもく会には、入門者の方も多くご参加いただいています。 突然 C# やらなければならなくなって途方に暮れている方、何となく C# をやってきたけど改めて見直してみたい方なども大歓迎です。
入門セミナー代わりでのご参加も歓迎です。プログラミング入門者の方も是非遊びに来てください。

特に C# で課題をお持ちでなくても是非遊びに来てください。

■ 目指す勉強会スタイル

世界一敷居の低い勉強会を目指しています。

何か聞きたいことがある場合は、聞く相手を決めずに独り言のようにつぶやくと誰かが拾ってくれる

何か共有したい情報を見つけた場合も、聞く相手を決めずに独り言のようにつぶやくと誰かが拾ってくれる

そんなスタイルでやっています。

■ 次回予定

次回は 2020/02/27 に開催予定です。

C# に関心のある方、是非遊びに来てください。

Uno Platform で はろーわーるど その2

Uno Platform の はろーわーるど 一連の記事の目次です

■ 今回の記事

Uno Platform の開発環境を用意する記事を以前に書きました。

プロジェクトを作成して行きます。

■ 新しいプロジェクトの作成

新しいプロジェクトの作成で次のテンプレートを選択しプロジェクトを作成します。
Cross-Platform App (Uno Platform)

■ 実行 (wasm)

プロジェクトを新規作成すると、5 つのプロジェクトが含まれたソリューションが作成されます。

プロジェクト プラットフォーム
<プロジェクト名>.Droid Android アプリ(実行できるプロジェクト)
<プロジェクト名>.iOS iOS アプリ(実行できるプロジェクト)
<プロジェクト名>.Shared 共通コード(実行できないプロジェクト)
<プロジェクト名>.UWP UWP アプリ(実行できるプロジェクト)
<プロジェクト名>.Wasm WebAssembly アプリ(実行できるプロジェクト)

プロジェクトが作成されたら、一旦リビルドを行い実行できるプロジェクトを実行します。
一番無難なプロジェクトは wasm です。まずは wasm プロジェクトから実行するのがオススメです。

■ 実行 (UWP)

UWP プロジェクトは実行に注意が必要です。
まず、開発マシンの Windows の [ 開発者モード ] を有効にします。

開発者モード を有効にしたら、リビルドをしたのち配置を行います。
おもむろにデバッグ実行します。

■ 実行 (Android)

Android はエミュレーターまたは実機が整っていれば、デバッグ実行できます。

■ 実行 (iOS)

iOS は macOS が必要になります。もし macOS をお持ちであれば、xcode の開発環境を整えてください。
次いで、Visual Studio for Mac をインストールします。

Windows で作成したプロジェクトを mac にコピーにします。デバッグ実行します。

■ 次回

次回はコードを変更し、動きのあるアプリにして行きます。

Uno Platform で はろーわーるど その1

Uno Platform の はろーわーるど 一連の記事の目次です

■ 今回の記事

Uno Platform でソリューション(プロジェクト)を新規作成して C# 世界に挨拶する記事は以前に書きました。

今回はもう一歩前へ進んで、開発環境の構築からデータダインディングや画面遷移の有る Uno Platform 完全に理解できるコードを書いていきます。

■ 開発環境の整理

開発環境は

  • Windows 10
  • Visual Studio 2019
  • .NET Core 3.1

を用意します。

Windows

普通にお手持ちの Windows マシンを用意してください。
Uno Platform の環境は残念ながら Windows です。mac ではプロジェクトの新規作成で躓いてしまいます。
(逆に言えばテンプレートから生まれたプロジェクトが手元にあれば、その先のコード書きと実行は mac でも一部可能です)。

■ Visual Studio 2019

Visual Studio をインストールします。ダウンロードはこちら

インストール時のワークロードの選択では、次のものを選択します (他のものを追加で選択しても構いません)。

Web & クラウド

  • ASP.NET と Web 開発

デスクトップとモバイル

  • ユニバーサル Windows プラットフォーム開発
  • .NET によるモバイル開発

他のツールセット

  • .NET Core クロスプラットフォームの開発

個別のコンポーネント

  • Windows 10 SDK (10.0.18362.0)

■ 拡張機能

Visual Studio の拡張機能で次のものを選択します。

  • Uno Platform Solution Templates

■ .NET Core

.NET Core をインストール。ダウンロードはこちら

■ 次回

次回はプロジェクトを作成して行きます。